Virtual Classroom and Video Assignments are two Bongo integrations directly accessed through your D2L course.
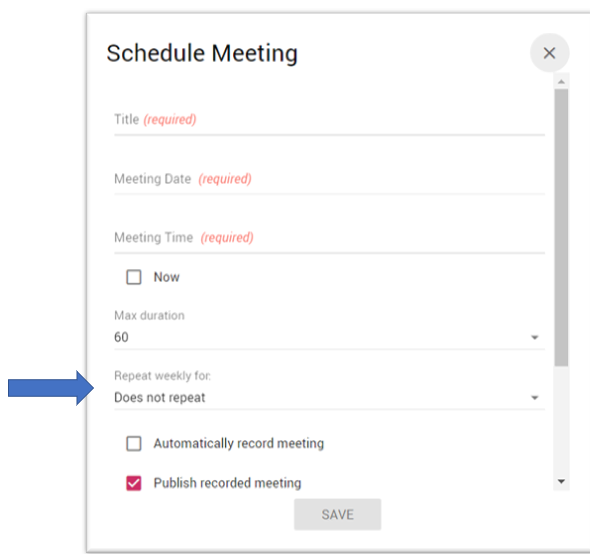
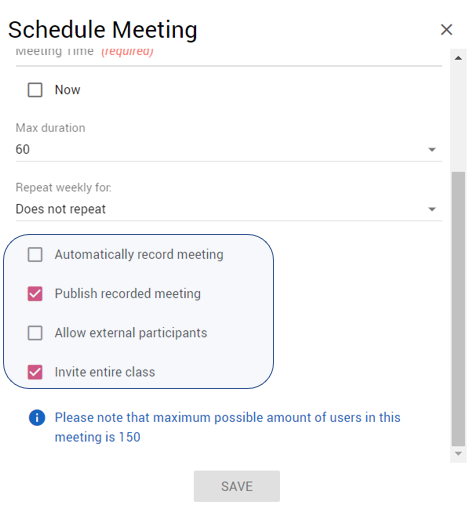
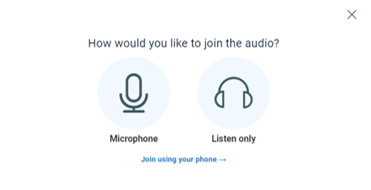
Virtual Classroom is used to schedule meetings with your students, with the option of recording and automatically saving the recording in your D2L course so students can re-watch. Virtual Classroom has similar features to Zoom, such as sharing screen, polling and breakout rooms.
Video Assignments provide an additional resource to increase student engagement by allowing students to record class presentations remotely, answer text questions with a timed video answer, and/or answer questions that overlay upon an instructor’s pre-recorded mini-lecture or video. Video Assignments allow for grading with scores passed directly to your D2L gradebook.
Below is an archived recording of this online webinar from the Teaching and Learning Center:
Knowing how and when students are interacting with course material can be invaluable and allow instructors the opportunity tweak and adjust their content during the term.
Below is an archive webinar recording from SSC’s Teaching and Learning Center focusing on various places within D2L instructors can access analytics and statistics about their courses, including looking for trends in late and missing submissions, viewing quiz questions and responses, comparing student learning between topics, confirming students are indeed accessing course material and strategic planning for intervention, if necessary.
Follett Discover is a powerful online tool that transforms the course materials discovery and adoption process for faculty, and helps students obtain, organize and instantly access their required and recommended course materials from within your learning management system. Follett Discover Administrator role is designed to work with the faculty experience and allow department administrators to manage adoptions.
This quick reference guide provides instructions on how to: • Set adoption permissions • Review and approve submitted adoptions • Pre-approve materials for faculty • View adoption progress and compliance at a glance
Seeing triple or more? When a course that is cross-listed in Colleague is batched to D2L at least three shells are created. One shell for each of the individual courses (ART-130-003 and then ART-E77-703) and one shell with the courses combined (ART-130-003, ART-E77-703). This process allows instructors increased flexibility. If you do not plan to post material by section (ART-130-003) and only to use the combined section (ART-130-003, ART-E77-703) you can make the individual course shells inactive which will hide them from the view of both you and your students. The individual shells themselves can not be deleted without impacting the enrollment of the course.
While in the course shell you wish to hide follow these steps:
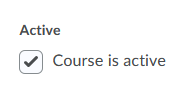
Wait until the Day Your Course Begins.
Select Course Tools
Select Course Admin
Select Course Offering Information
Uncheck the box that reads “Course is Active”
So What Does this Mean for Cross-Listed Courses?
1) Use the individual Parent Shells for each Specific Section (usually 2 per course)
This will allow you to post different information (due dates, announcements, assignments, quizzes, etc.) to each section of that one course.
For example, you might post instructions for the virtual students (one parent section (PSY-211-002)) that are different than what the in-person students (a second parent section (PSY-211-072)) will do.
The downside is you may have common information for both groups and you would have to post this information twice (one in each parent section).
With this option you would hide the combined child section (PSY-211-002, PSY-211-072) when it becomes active on the first day of your class.
2) Use the Combined Child Shell that Includes all Parent Sections for that Course (1 per course)
This allows you to post information once and all students in the class will see the same thing, regardless of the child section they are in (i.e. virtual or in-person).
Good if each section is taking the same quizzes and doing the same assignments.
If desired, students can be sorted by sections. This can be done in D2L under Course Tools > Admin or in the Gradebook.
The downside is that if different parent sections have different information (due dates, announcements, etc.) you will have to insure each section knows which information pertains to them.
With this option you would hide the individual parent sections (PSY-211-002)(PSY-211-072) when they become active on the first day of your class (see above instructions).
Have you ever copied a previous course into the current term’s course shell and then realized it was the wrong course? Or have you ever just wanted to start from scratch in your course design of your D2L course? If so, D2L now has a course reset feature to allow faculty to “start over” with their course shell.
The course reset permanently deletes everything in the course including all content, activities, grade book items, etc., but does not affect user enrollments.
Who can reset a course and where is it found?
The course reset feature is only available to D2L Admins. If you’d like your course reset, email your request to the Teaching and Learning team at ssconline@ssc.edu. Include the course information, such as term, course id and section information in the email.
What if students have already started using the course?
If the course has started, it may be too late to start over. In that case, you will have to delete content, assignments, etc. on an individual basis.
Welcome to the Dual Delivery Student Engagement Strategy and Examples blog. The Teaching and Learning staff at South Suburban College will provide strategies and examples to assist faculty in teaching in a dual delivery format. Check back often for updates as we plan to add creative and innovative strategies throughout the term.
What is Dual Delivery at South Suburban College?
A dual delivery class provides for both limited in-person seating and virtual students attending via D2L virtual classroom. Students must choose their preferred delivery mode section when registering. Virtual students are expected to be available at the scheduled class and lab times.
What do the Virtual Students Experience?
Remember, the virtual student can only see a small portion of the physical classroom, usually the instructor and white board. The instructor can also share their screen as they showcase a PowerPoint presentation, website, or a variety of course content. But if in-class students are talking and participating in the class discussion, the virtual students may only be able to hear audio (unless the instructor moves the camera). These are considerations to keep in mind when designing your course in D2L or guiding in-class discussions.
Strategy and Example #1 – Incorporate Weekly Online Discussion Forums
The Set-up
To encourage student engagement with your virtual students, create an online discussion forum with a topic you plan to discuss in-class. This allows your virtual students to feel like they have another option to participate and be heard.
To encourage building community with both in-class and virtual students, make it a requirement that both sets of students respond to the weekly online discussion forum.
Name each weekly discussion forum Week 1, Week 2, Week 3, etc., so that the discussion forums can be easily identified.
To encourage participation, provide feedback and grading by giving the weekly online discussion forum a point value, i.e., make it worth their time.
Let students know that their online discussion forum post may be brought up during class time.
Prior to your in-class time, read the online discussion forums and take note of interesting comments by both in-class and virtual students.
During your class time, call on two students who had interesting comments in the online discussion forums or that you would like to clarify specifics of their posts.
When students respond during class time, have them mentioned their name first. This allows the virtual students to make a connection to the in-class student. The virtual student may not see those in-class students, but they may have read their online discussion forum posts.
See it In Action – Examples
“ I use the out-of-class posts to guide in-class discussions”. Dr. Jay Howard, reprint from the Teaching Professor Newsletter (December 2016)
Dr. Jay Howard is a professor of sociology and dean of the College of Liberal Arts and Sciences at Butler University and author of the book Discussion in the College Classroom – Getting your Students Engaged and Participating in Person and Online.
Dr. Howard uses this strategy for his traditional face-to-face courses.
According to a Reprint from the Teaching Professor Newsletter, Dr. Howard has found advantages to this strategy:
Encourages class-wide participation.
Students who might experience anxiety of being called upon in-class, may feel better organizing their thoughts in an online discussion forum first, then clarifying their thoughts in-class.
Since students know their online discussion forum posts may be brought up in-class, this encourages them to provide reflective posts.
Motivates students to complete readings required that week. Students can be assigned to provide a quote from a reading in the online discussion forum or post something that raises a question.
Since Dr. Howard is reading the online discussion forums prior to class, he can determine where students may be struggling and if more in-class discussion is required.
On that same note, he can also determine if students are on track and he can now focus on other areas of discussion.
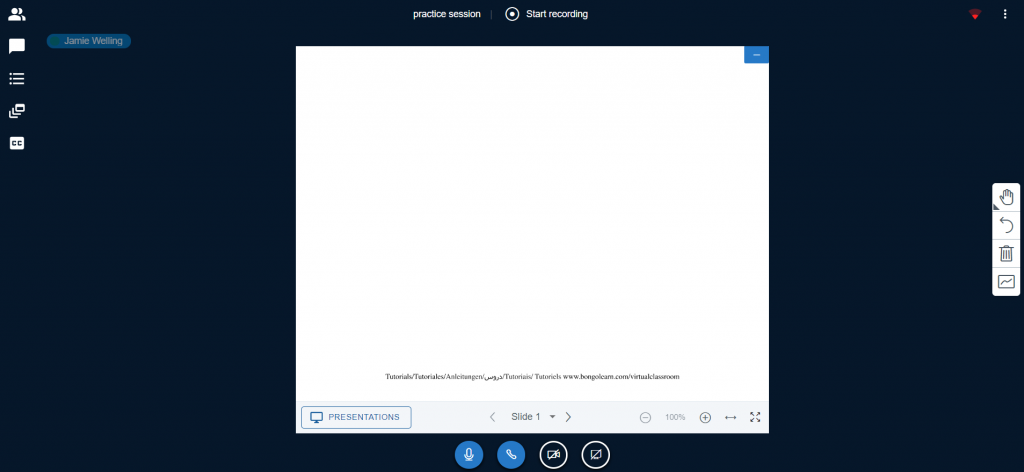
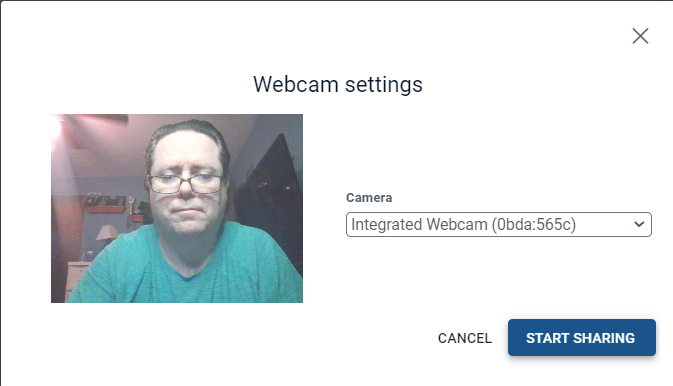
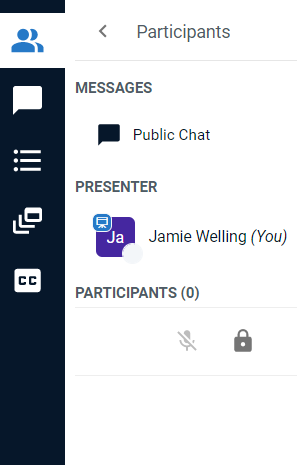
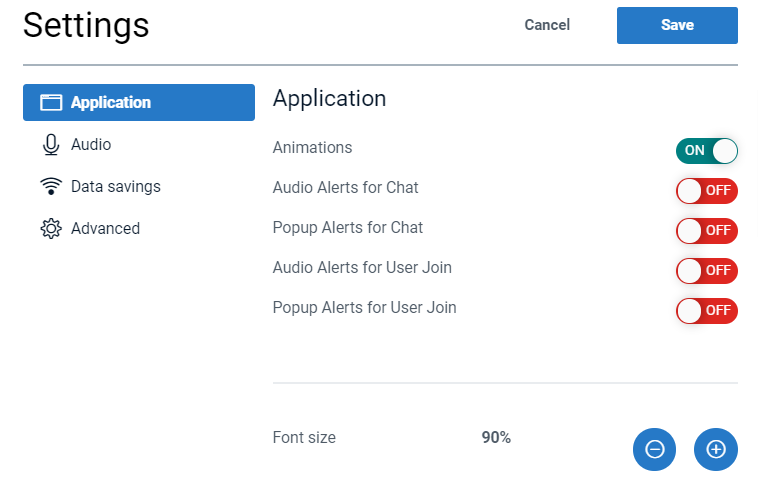
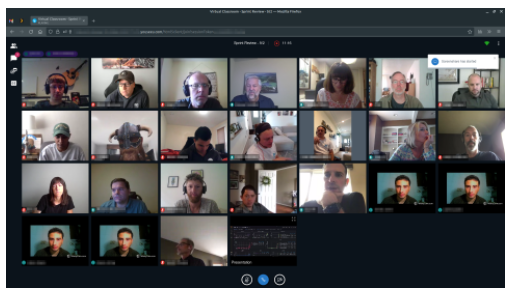
Bongo recently introduced a new feature in their virtual classroom platform that increases the number of student cameras that can be displayed at one time. The Large Gallery view can be found under settings and can be utilized by both the instructor and student to customize their individual view. Presentation view is on by default, but users can toggle between Presentation view and Large Gallery view.
Bongo Virtual Classroom Large Gallery View
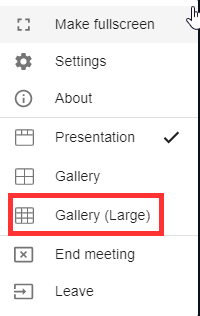
Toggle Between Presentation view and Large Gallery view
While in the virtual classroom, select the Settings options (three dots in the upper right corner)
Select Large Gallery view
Repeat steps to return to Presentation view
Important Note – In order to use Large Gallery view, at least one camera must be turned on, otherwise this option will be greyed out. Large Gallery view is not available on mobile devices.
South Suburban College has an institutional license for Respondus Lockdown Browser. Students should never have to pay any fees associated with Respondus Lockdown Browser.
If using a MyPearson lab course, instructors will have to complete an additional step to avoid students paying a fee. It’s a one-time set up of connecting Respondus Lockdown Browser in D2L to their Pearson MyLab course.
Step 1: Enter your course in D2L
Select Quizzes > LockDown Browser
Select Continue
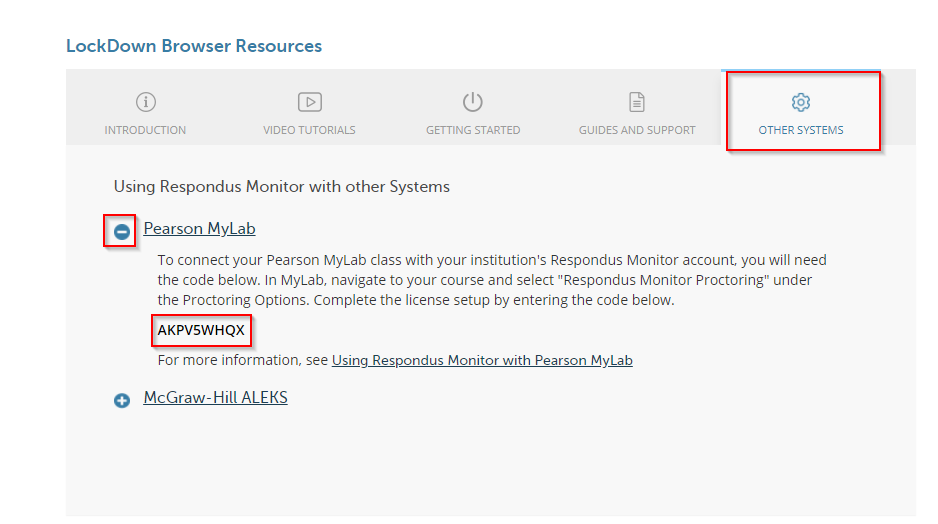
Under LockDown Browser Resources > Select Other Systems
Select the + icon next to Pearson MyLab
Copy the Pearson MyLab Code (code is unique for each instructor)
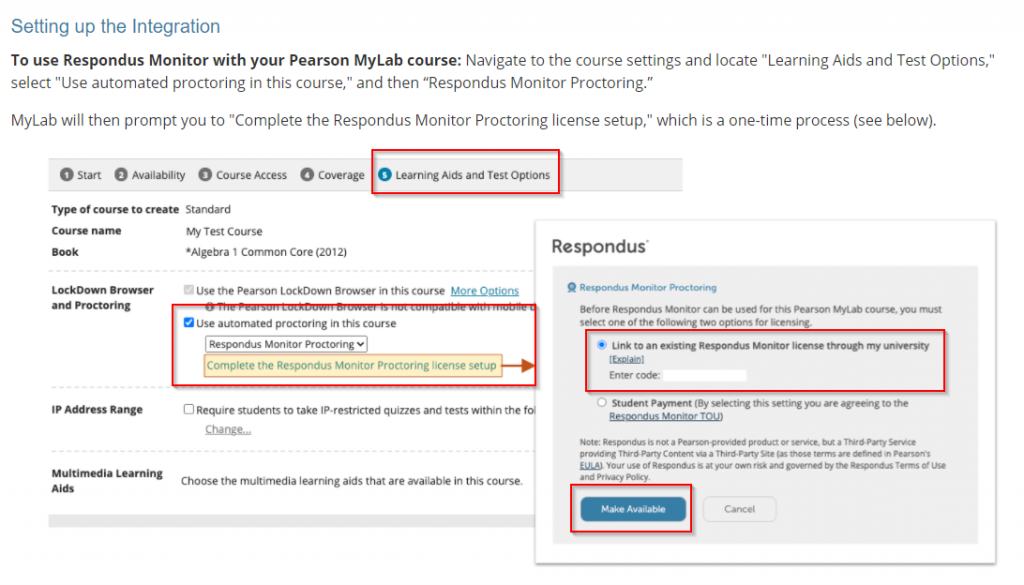
Step 2: Go to your Pearson MyLab course
Navigate to course settings > Learning Aids and Test Options
Under LockDown Browser and Proctoring > Check Use Automated Monitor in this course
Select Complete the Respondus Monitor Proctoring license Set up
When teaching a combined section course, there may be times when an instructor would like to release an assignment or quiz to a particular section of students. Releasing assignments and quizzes to sections have slightly different directions which are referenced below:
Assignment – Release an assignment to a particular section of students
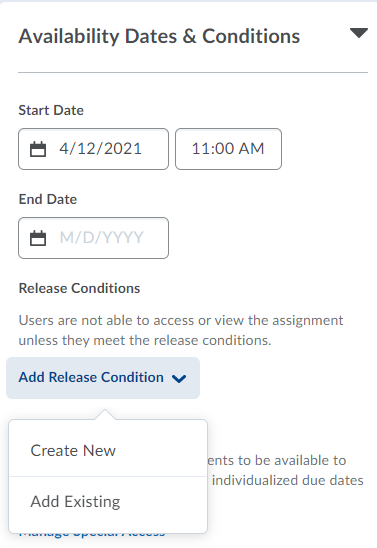
Edit a current Assignment
Select Availability Dates and Conditions
Under Release Conditions > Select Add a Release Condition
Select Create New
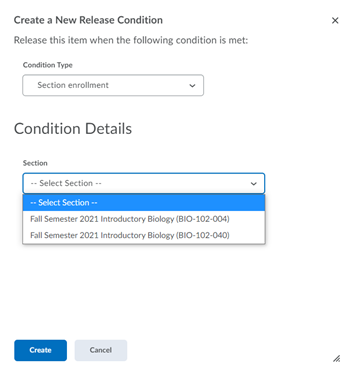
Under Condition Type > Select Section Enrollment
Under Condition Details > Select the Section and Create
Only students in that section can now access the assignment
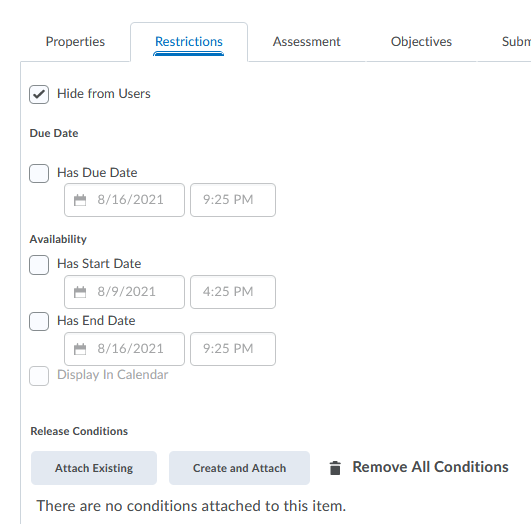
Quiz – Release a quiz to a particular section of students
Edit a current Quiz > select Restrictions
Under Release Conditions > Select Create and Attach
Under Condition Type > Select Section Enrollment
Under Condition Details > Select the Section and Create
Only students in that section can now access the quiz