Category: Classroom Equipment

2024SP Faculty Semester Guide

Updated: January 13, 2024

Got questions? This page is full of resources to the questions folks are asking most frequently about 2024SP. Don’t forget to check for additional resources at https://tl.ssc.edu/ or email ssconline@ssc.edu for additional assistance.

Things You Need to Know Before the Semester Begins

Setting Up Multi-Factor Authentication

Getting Stated with Office 365

D2L Subscription Training / Brightspace Community

TL Live Training Calendar

Best Practices for Basic D2L Content

Getting Started with Simple Syllabus

Getting Started with Simulcast/Dual Delivery and/or Lecture Capture

Getting Started with Bongo

Scheduling a Meeting and Launching Bongo

Getting Started with Turnitin

Cross-listed/Dual Delivery Courses in D2L (Hidding Courses)

Using Groups and Restrictions to Assign Quizzes or Other Activities

Getting Started with the Promethean Titanium ActivPanel

Getting Started with the Epson Brightlink Projector

Outcomes Assessment – Rubrics at SSC – General Education and Course Level

Getting Started with Respondus for Online Proctoring

Things You Need to Know About Grading

Entering Attendance Verification in D2L

Entering Active Pursuit and Midterms in D2L

Entering Final Grades in D2L

Getting Started with Simulcast/Dual Delivery and/or Lecture Capture

Updated: August 4, 2021

Classrooms upgraded for simulcast delivery include a webcam, a second Epson projector, and a projection screen. The second projector and screen (located in the back of the room) can be used to view your virtual classroom students. Virtual classroom students will be able to view your webcam, anything you screen share and communicate with you through chat or audio.

Before Your Class Begins

  • Log on to the Teacher’s Workstation with your SSC Network Credentials
  • Turn on the Front Projector, and then the Rear Projector
  • Log into D2L at https://d2l.ssc.edu
  • Start your Virtual Classroom Session inside of D2L
  • Allow Bongo to access the Classroom Webcam and Microphone (HuddleCam 3A)
  • Turn on the Chat Alert Inside of the Bongo by Accessing the Virtual Classroom Settings
  • If you are planning to use a PowerPoint you may want to uncheck ‘Use Presenter View’ and set your monitor to ‘Primary Monitor’ in PowerPoint.
To Turn Off Presenter View in Microsoft PowerPoint Select ‘Slide Show’
  • Turn off the lights in the front of the classroom.

Moving the Virtual Classroom Screen to the Rear Projector

  • On the Teacher’s Workstation, locate the browser window containing your Virtual Class Session in Bongo
  • Hold down the left mouse button while on the browser window and drag it off the screen to your right
  • You will now see the browser window with the Virtual Class Session in Bongo appear on the Rear Projection Screen
  • Visit https://tl.ssc.edu/getting-started-with-bongo/ if you need help “Getting Started with Bongo”

Using the WebCam

Camera
WEBCAM INSTALLED IN CEILING OF CLASSROOMS

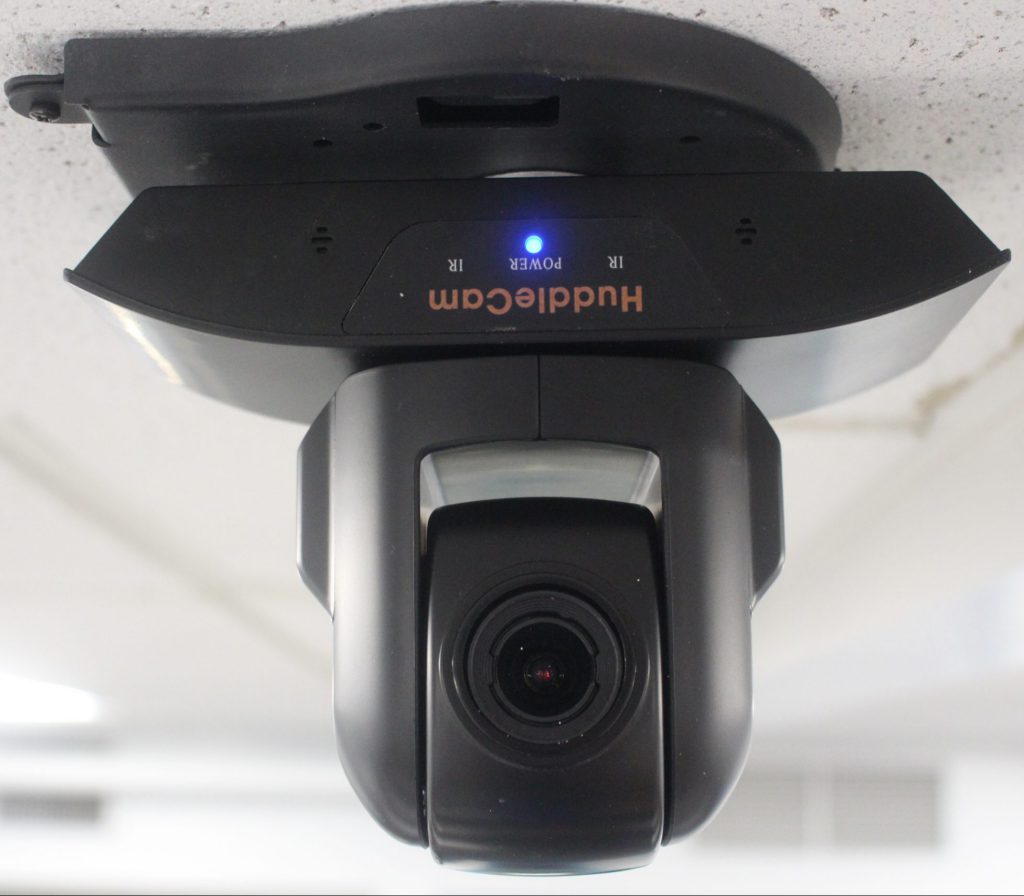
A webcam has been installed to allow remote learners a view of the classroom. It is positioned so that it can capture not just the instructor, but also any information presented on the dry-erase board in the front of the classroom. The Webcam is on if the blue light is visible as in the photo above. If there are no lights visible on the camera, press the power button on the webcam remote as pictured below.

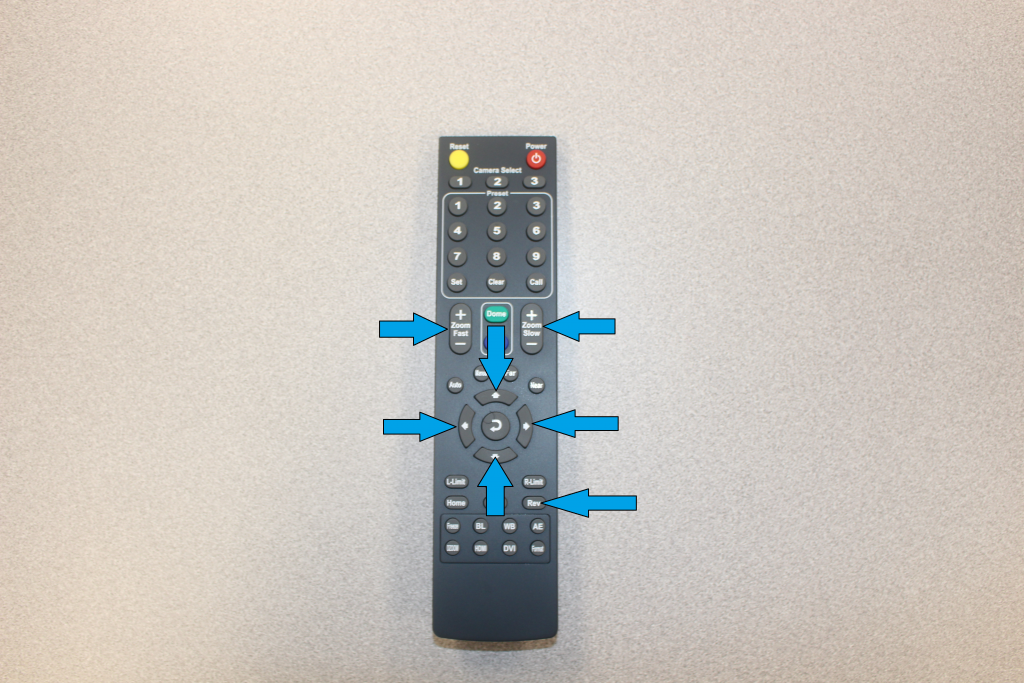
WEBCAM REMOTE CONTROL

Using the Webcam Remote Control

  • The left/right arrows move the webcam left and right
  • The up/down arrows tilt the webcam
  • The zoom fast/slow buttons control the webcam zoom feature
  • The auto button can be used to automatically focus the webcam
  • If by chance the image displayed by the webcam is upside down, press the ‘REV’ button, this will right your image.

At the End of Class

  • Turn off Front and Rear Projectors
  • Logout of D2L
  • Logout of Teacher’s Workstation

__________________________________________________________________________________________

Optional Laptop Connection

Instructors can use their personal laptop computer to replace the Teacher’s Workstation in the classroom.

NOTE: By using your personal laptop you will not be able to use the interactive features of the Epson Integrated Projector or the Promethean ActivPanel.

Step 1: Connect the USB and HDMI cables into the corresponding laptop ports as shown below.

USB Connection

HDMI Connection

Step 2: Press the black button so the green light changes from input 1/A to input 2/B on the HDMI video switch. This connects the laptop to the projection system.

Step 3: Press the circular Webcam controller button to switch the Webcam connection from the Instructor Workstation to the Laptop.

USB switch
WEBCAM OPERATION SWITCH FOR LAPTOP

__________________________________________________________________________________________

Optional Use of a Document Camera

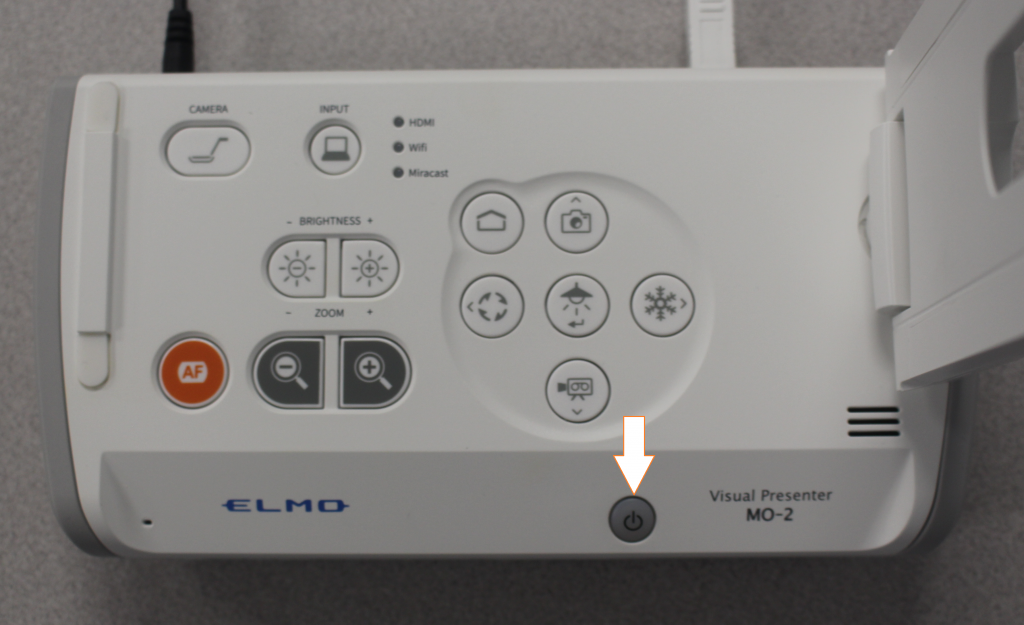
Step 1: Turn on (Blue Light Comes On) the Elmo Document Camera Power

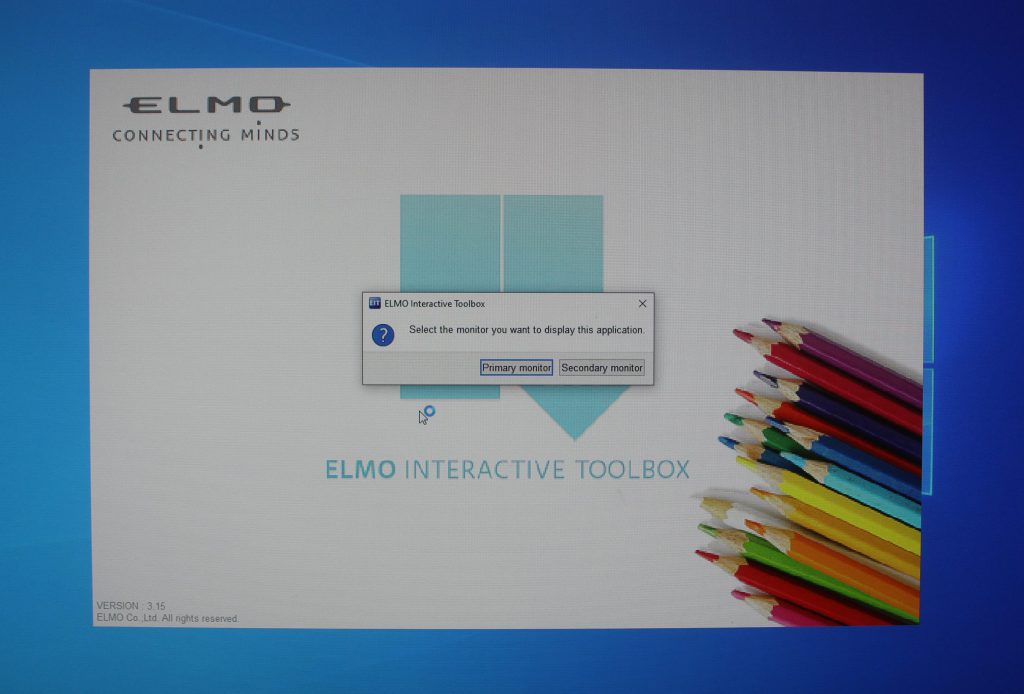
Step 2: Select ‘EIT ICON’ Shortcut on Teachers Workstation.

Elmo Operation Face, Power

Step 3: Select ‘Primary Display’ to display the image on Teachers Workstation or Select ‘Secondary Display’ to display the image on Projector Display Screen.

Step 4: Users can use the ‘Pen Feature’ within the EIT Program to mark or edit what is being displayed.

Elmo Pen User Options
PC Display Output
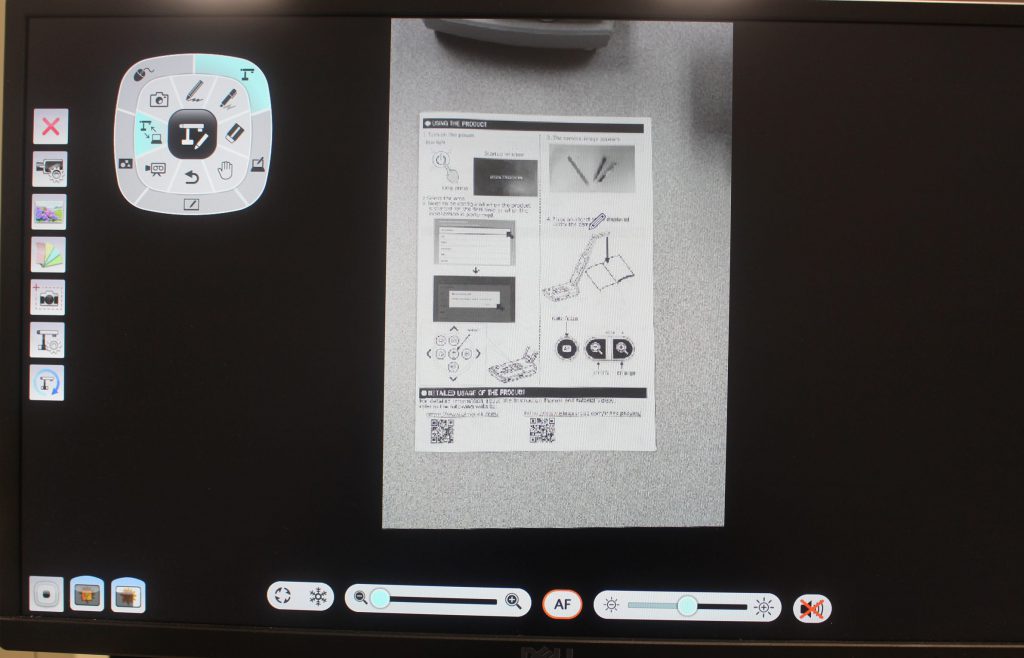
THIS IS AN EXAMPLE OF FULL-SCREEN OPTIONS WHEN USING THE EIT PROGRAM INCLUDING SAMPLE IMAGE DISPLAYED THROUGH DOCUMENT CAMERA.

Step 5: Once you are finished with the unit, make sure you turn the document camera off. (NO Lights on the unit)

Getting Started with the Epson Brightlink Projector

Here are a few helpful tips on how to use Epson Brightlink interactive projector.

1. How to Use the Easy Interactive Tools in Interactive Mode

2. How to Use the Easy Interactive Tools in Whiteboard Mode

3.  Epson BrightLink Projectors | How to Use the Interactive Pens

Please note our systems only have one pen.

4. Instructions For Microsoft Ink With Word Documents

To use the Ink Pen tool on a word document
  1. Open a Microsoft Word document.
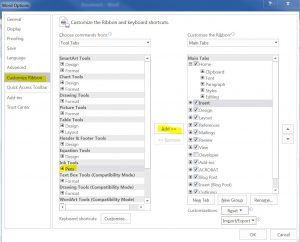
  2. Select File > scroll to ‘Options’ >
  3. On the left-hand side of the Word ‘Options’ box select ‘Customize Ribbon’
  4. Under ‘Choose Commands’ there is a drop-down box, (the first selection is says ‘Popular Commands’)> open that box and select ‘Tool Tabs’.
  5. In that tab highlight ‘Pens’
  6. Select ‘Add’ and hit ‘OK’
  7. Now in your Word document, the top menu bar should have a ‘Pens’ tab.  Clicking on that will allow you to use the Ink Pen tool at your discretion on the document
 Microsoft Custom Tools

5. How to Calibrate the Interactive Pens