- On the blue navigation bar, on the far right click on ‘more’ drop down menu and click on ‘ATTENDANCE’
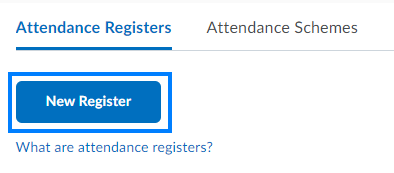
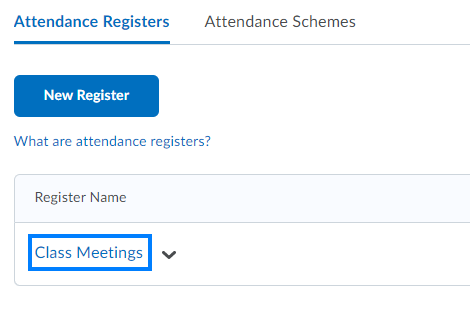
- Click New Register
- Enter the Name of the attendance register and other optional properties as needed
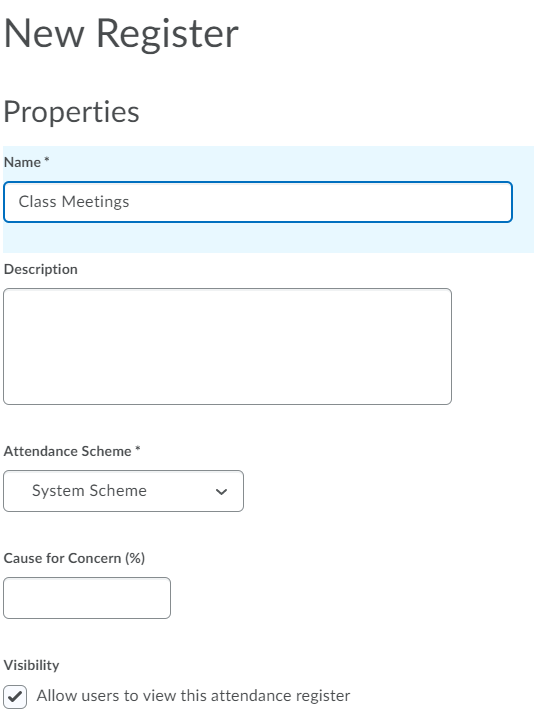
NOTE: Students are able to see these attendance registers from your course in Brightspace from the Course Tools menu unless the visibility setting is unchecked.
- Enter a session name: This example uses attendance for Class Meetings.
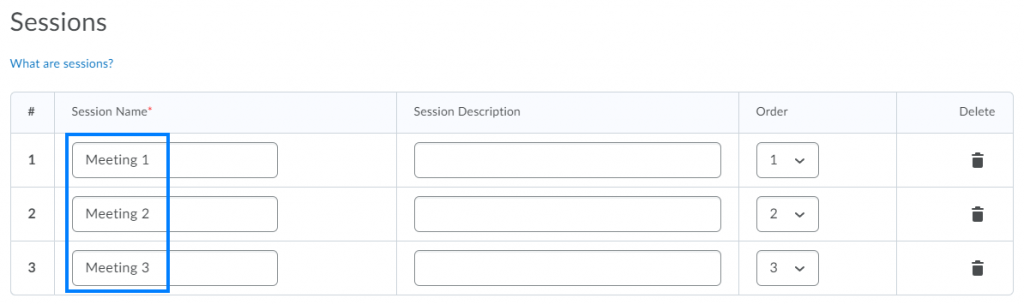
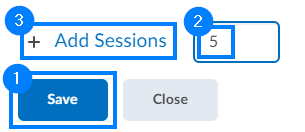
- To add additional sessions to the register, click SAVE, enter the number of sessions to be added, and click ADD SESSIONS.
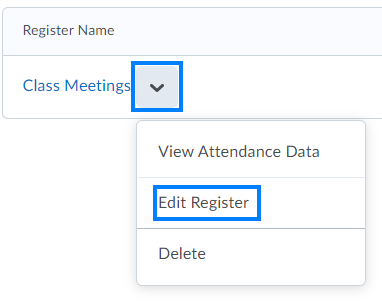
- To return and add or remove sessions at a later time, click the drop-down icon to the right of the register and select EDIT REGISTER from the drop-down.
ENTER ATTENDANCE:
- From ‘MORE’ on the navigation bar, Click Attendance:
- Click the name of register.
- Click the Calendar icon beside session to enter the attendance:
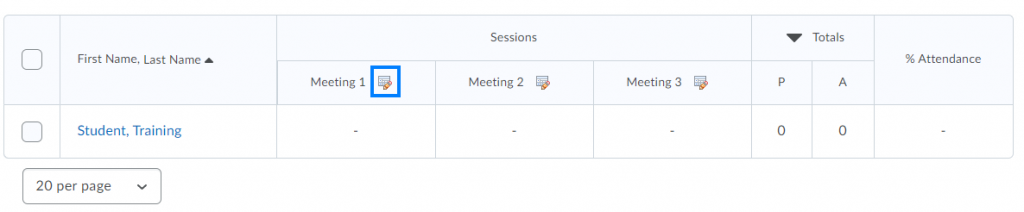
- Click the Attendance Status drop-down to set each student’s status:
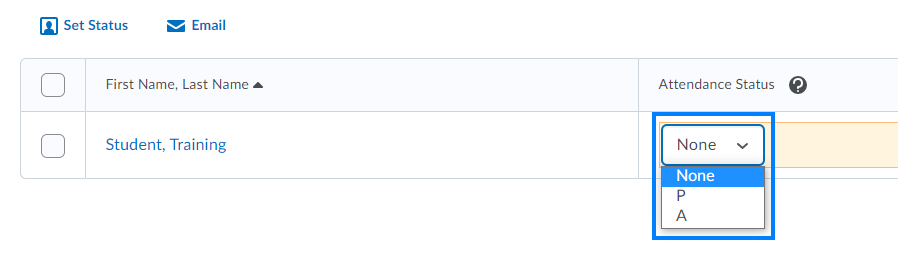
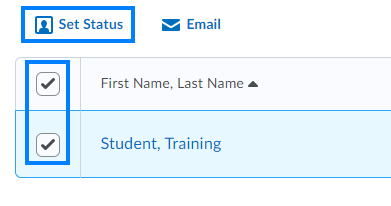
- Alternatively, set the Attendance Status for students in bulk by selecting multiple students and clicking ‘SET STATUS’