Classrooms upgraded for simulcast delivery include a webcam, a second Epson projector, and a projection screen. The second projector and screen (located in the back of the room) can be used to view your virtual classroom students. Virtual classroom students will be able to view your webcam, anything you screen share and communicate with you through chat or audio.
Before Your Class Begins
Log on to the Teacher’s Workstation with your SSC Network Credentials
Turn on the Front Projector, and then the Rear Projector
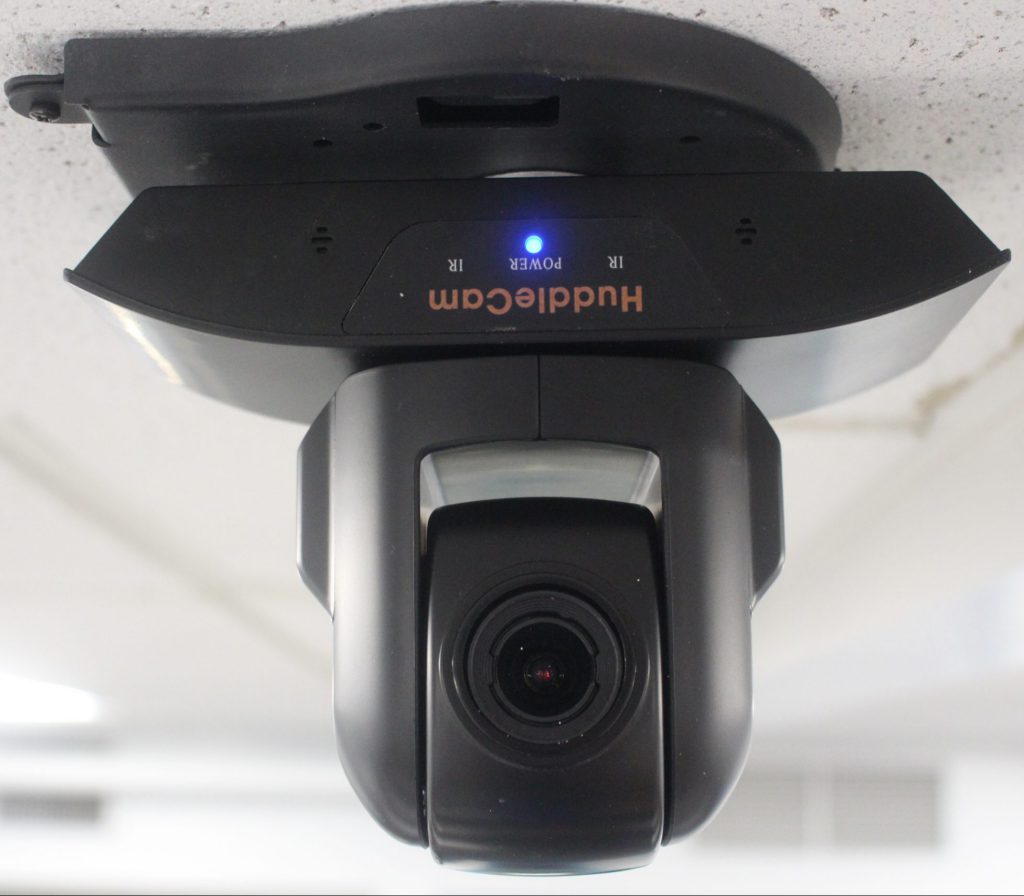
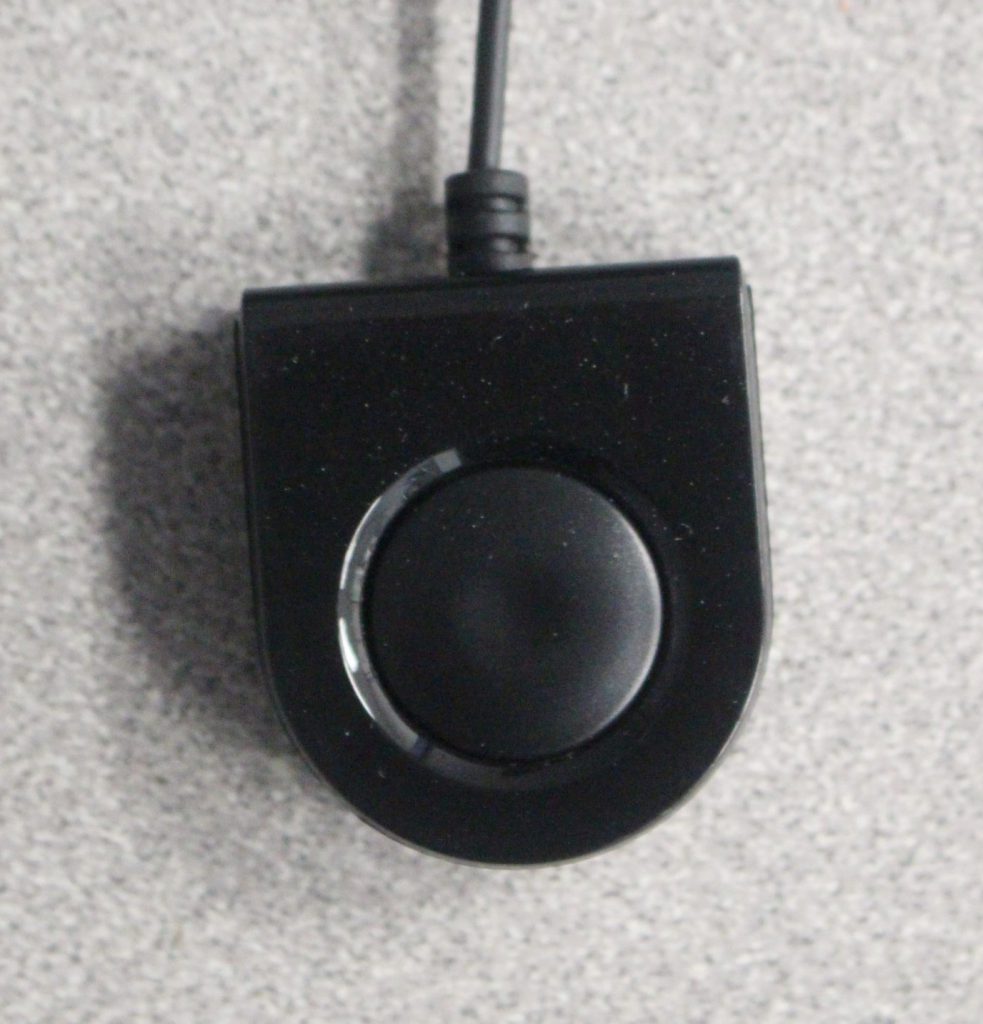
A webcam has been installed to allow remote learners a view of the classroom. It is positioned so that it can capture not just the instructor, but also any information presented on the dry-erase board in the front of the classroom. The Webcam is on if the blue light is visible as in the photo above. If there are no lights visible on the camera, press the power button on the webcam remote as pictured below.
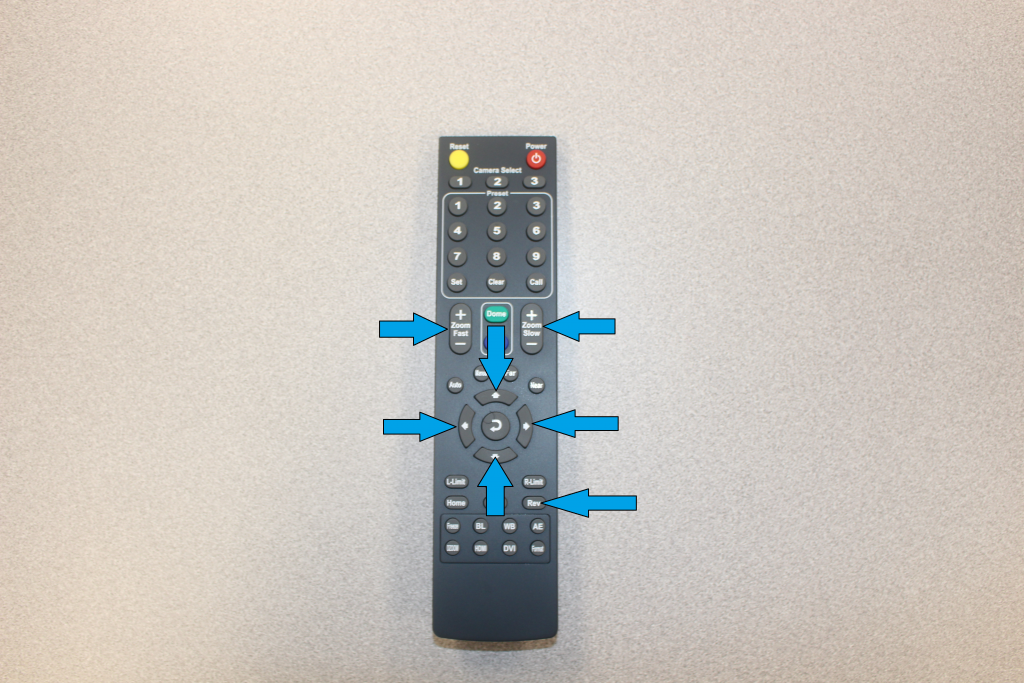
WEBCAM REMOTE CONTROL
Using the Webcam Remote Control
The left/right arrows move the webcam left and right
The up/down arrows tilt the webcam
The zoom fast/slow buttons control the webcam zoom feature
The auto button can be used to automatically focus the webcam
If by chance the image displayed by the webcam is upside down, press the ‘REV’ button, this will right your image.
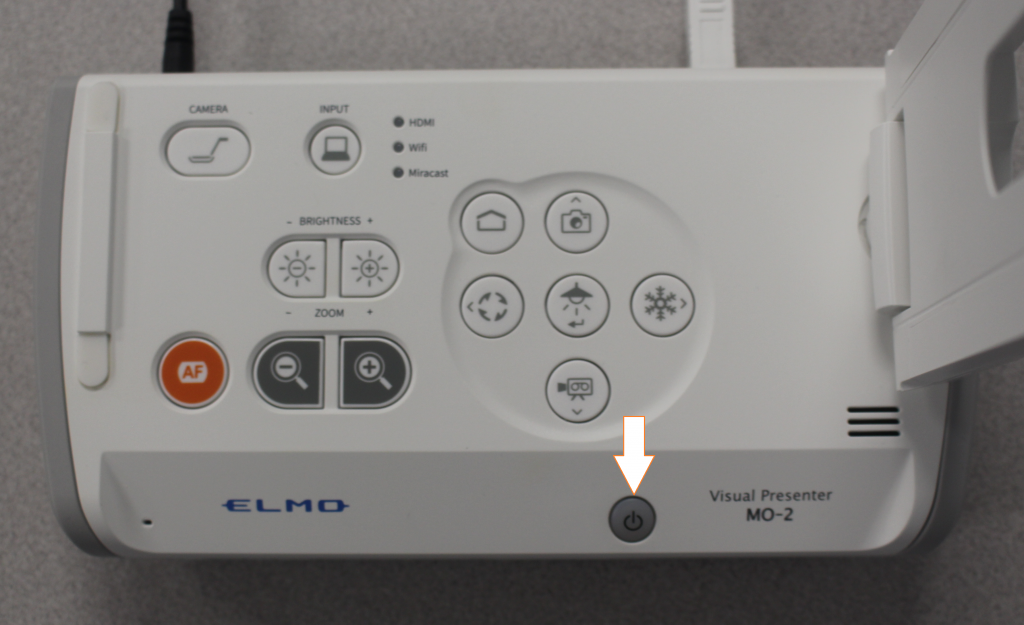
Step 1: Turn on (Blue Light Comes On) the Elmo Document Camera Power
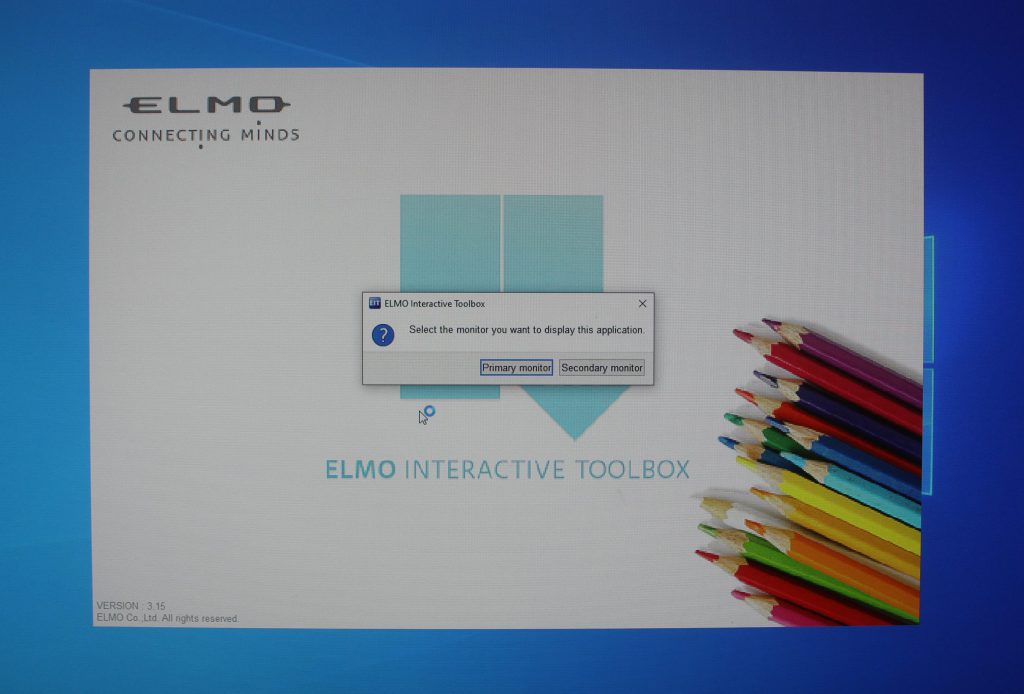
Step 2: Select ‘EIT ICON’ Shortcut on Teachers Workstation.
Step 3: Select ‘Primary Display’ to display the image on Teachers Workstation or Select ‘Secondary Display’ to display the image on Projector Display Screen.
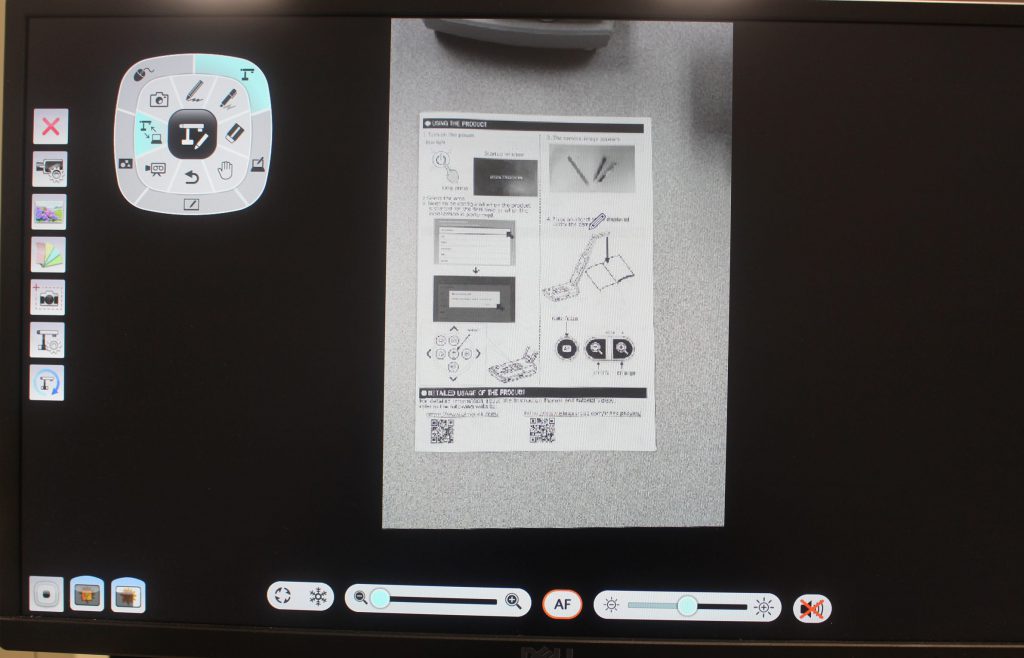
Step 4: Users can use the ‘Pen Feature’ within the EIT Program to mark or edit what is being displayed.
THIS IS AN EXAMPLE OF FULL-SCREEN OPTIONS WHEN USING THE EIT PROGRAM INCLUDING SAMPLE IMAGE DISPLAYED THROUGH DOCUMENT CAMERA.
Step 5: Once you are finished with the unit, make sure you turn the document camera off. (NO Lights on the unit)
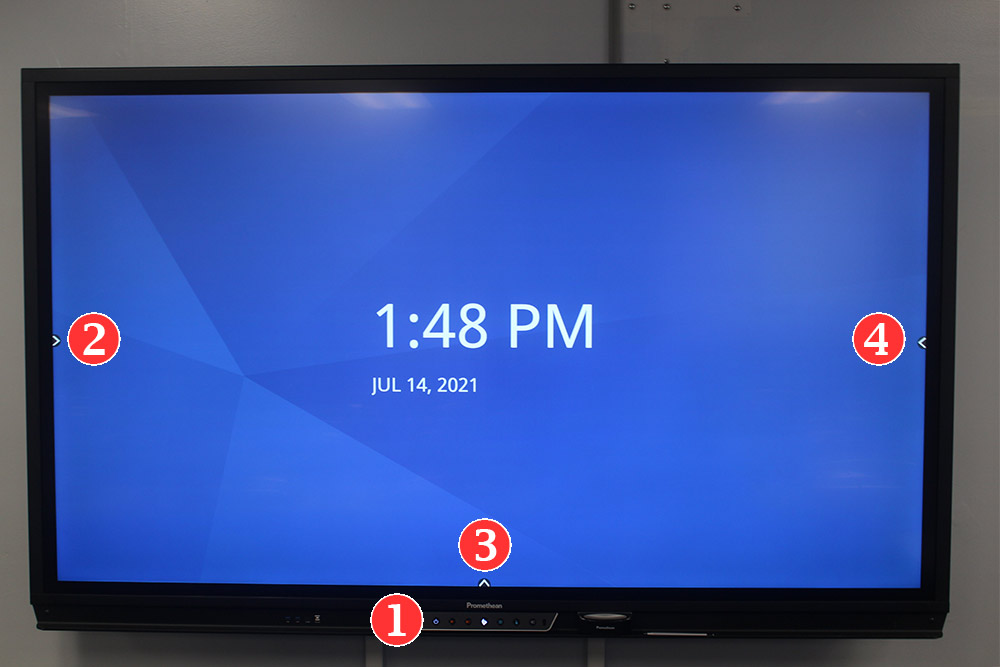
A Quick Walk Through with JamieMounted Promethean Titanium Active Panel Home Screen in Classrooms
Red Circle 1: Although the Promethean ActivPanel should come on automatically as you approach, there is a ‘POWER BUTTON’ on the bottom of the frame to turn the unit on/off.
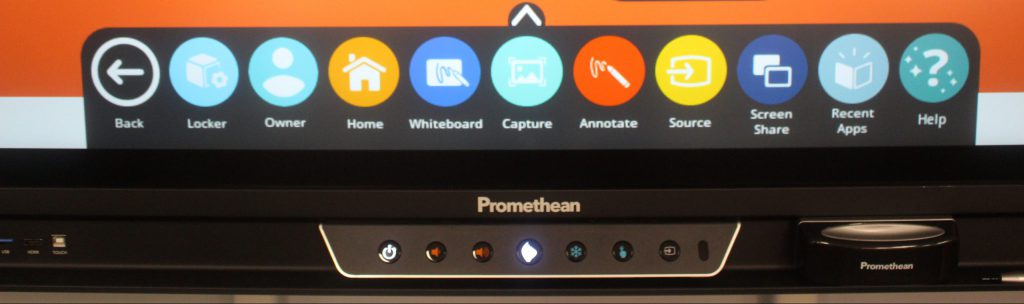
Red Circle 2, 3 & 4: These arrows provide access to your ActivPanel ‘MENU’ page.
Active Panel Menu OptionsApps in the Locker
Pictured above is the ‘LOCKER’ options menu with the Apps and Settings. Promethean ‘LOCKER’ allows access to commonly used Apps such as:
Chromium (Default Web Browser)
Microsoft Office
Adobe Acrobat
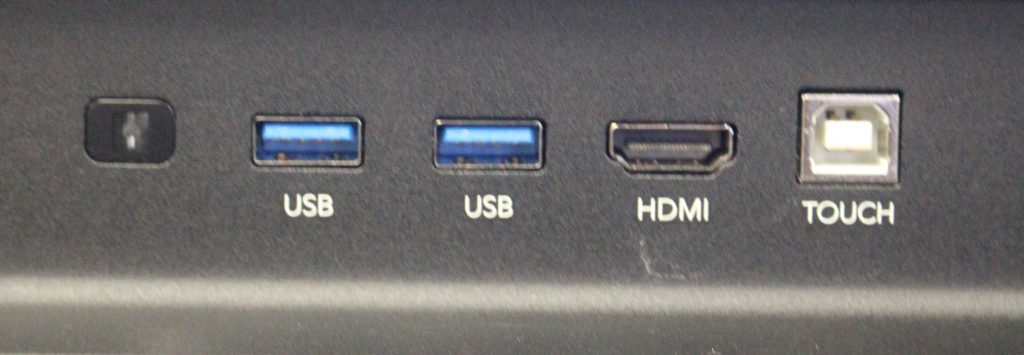
Ports at the Bottom Front of the Frame
The Promethean ActivPanel has additional USB and HDMI ports for accessing external media located at the bottom front of the frame.
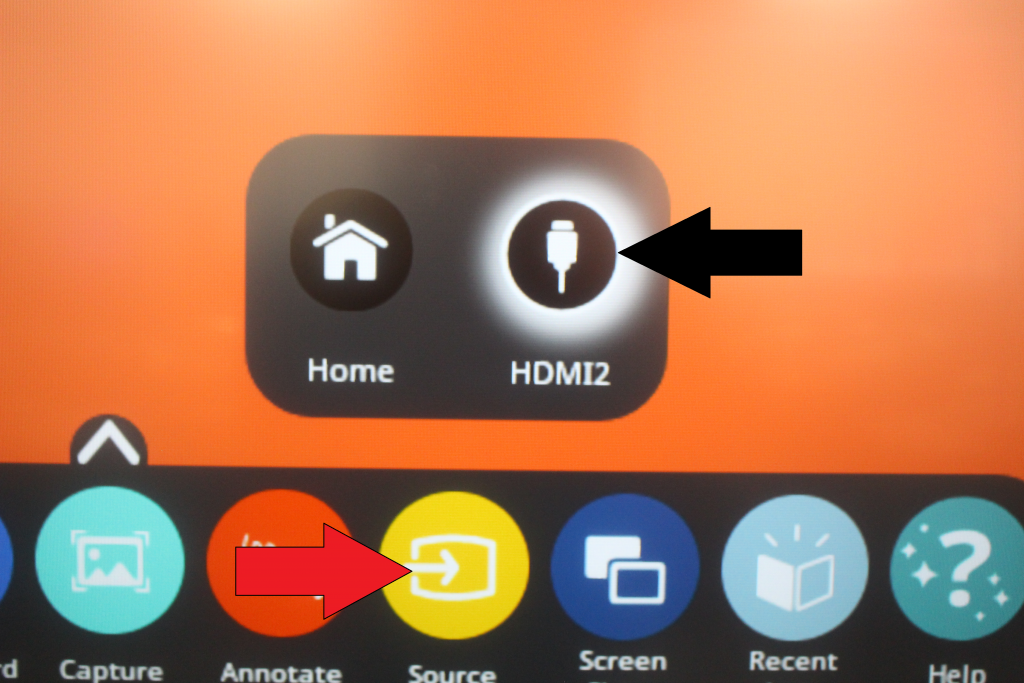
Home and HDMI Source Options
The Promethean ActivPanel has an option to mirror what is on the Teacher’s Workstation in the classroom. On the home screen select one of the arrows to bring up the menu block. Click on ‘SOURCE’ and select ‘HDMI 2’. The display on the Promethean ActivPanel will now mirror the Teacher’s Workstation. The Promethean ActivPanel is a touch-screen and can now be used to control the Teacher’s Workstation.
You can also change the input by pressing the ‘Source’ button on the bottom of the ActivPanel frame.
Please note that the Promethean ActivPanel is touch-sensitive. It is important to not PRESS TOO HARD which can cause DAMAGE to the screen. The ActivPanel comes with a ‘PEN’ for those who want to use it as an option to the touch-screen function.
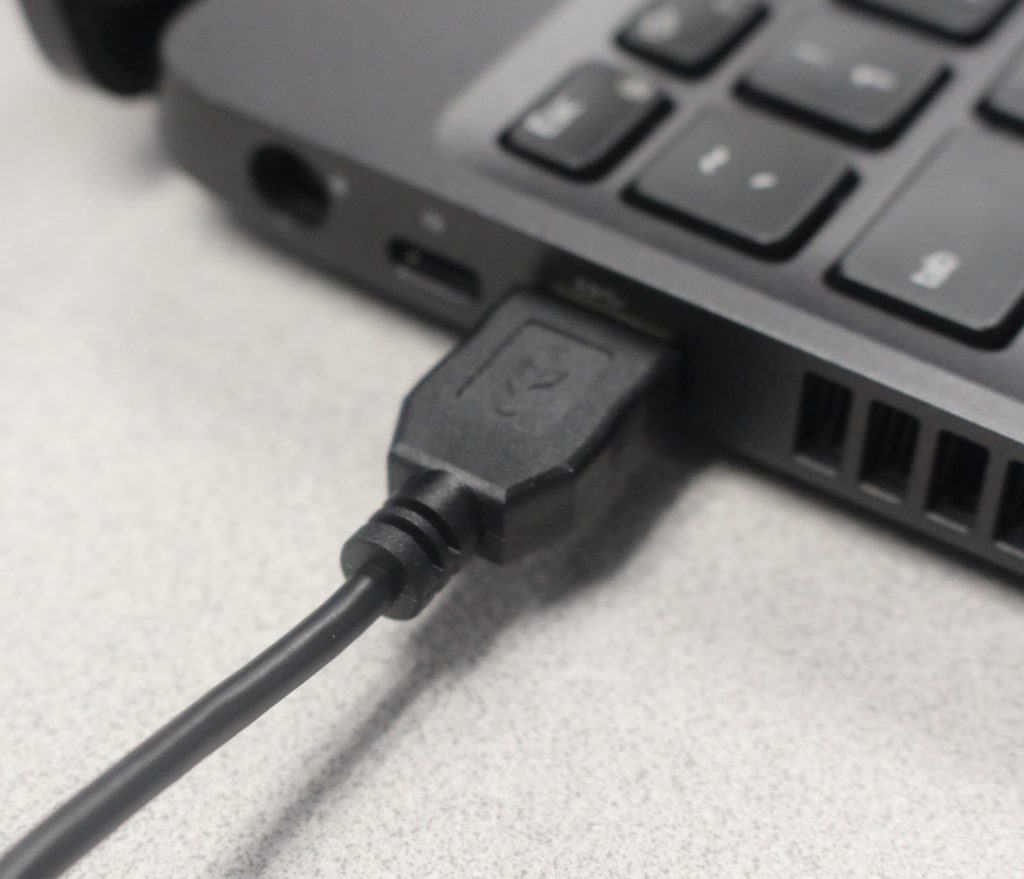
Instructors can use their personal lap top computer to replace the Teacher’s Workstation in the classroom.
NOTE: By using your personal laptop you will not be able to use the interactive features of the Epson Integrated Projector or the Promethean ActivPanel.
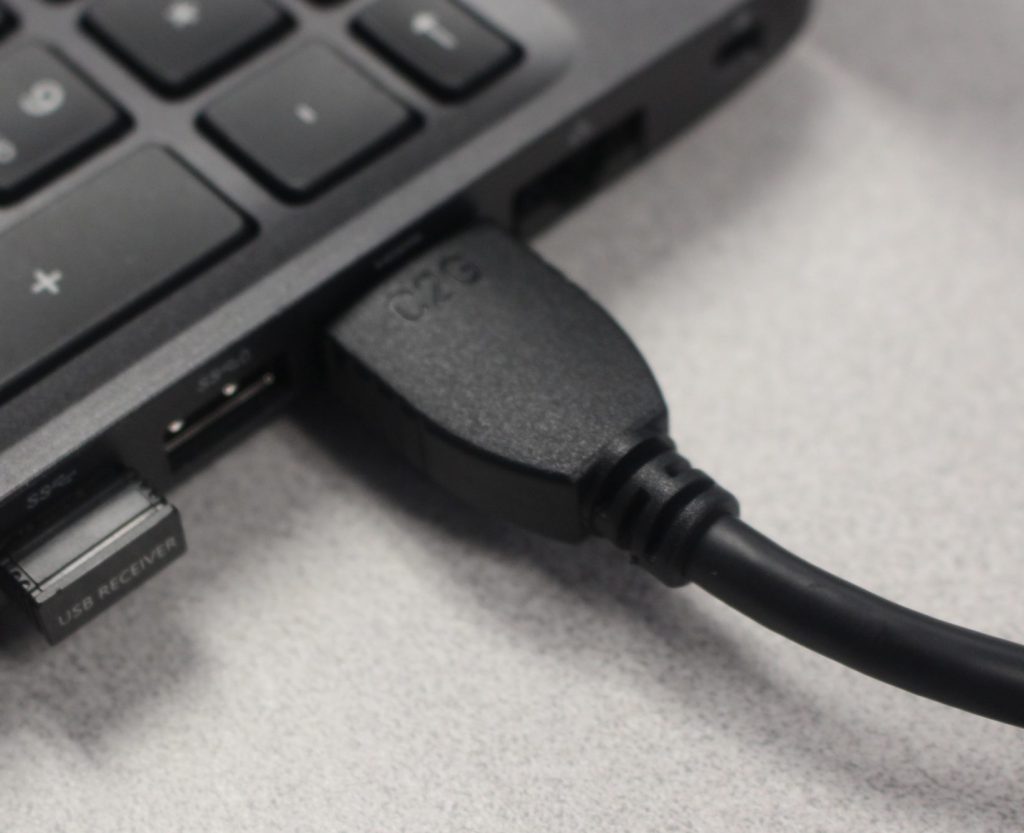
Step 1: Connect the USB and HDMI cables into the corresponding laptop ports as shown below.
USB Connection
HDMI Connection
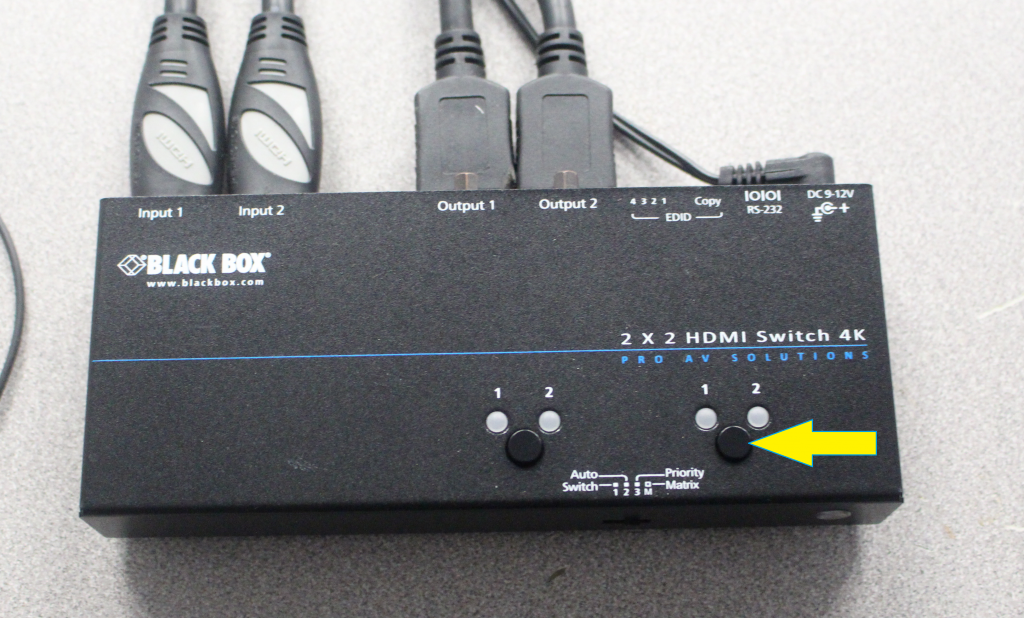
Step 2: Press the black button so the green light changes from input 1/A to input 2/B on the HDMI video switch. This connects the laptop to the projection system.
Step 3: Press the circular Webcam controller button to switch the Webcam connection from the Instructor Workstation to the Laptop.
This website offers training tips as well as standardized ways to use SMART Boards and Projectors in the class room. Please email ssconline@ssc.edu or call 708-225-5825 option 2 to arrange for in-person training with a member of our team.
Here are a few helpful tips on how to use Epson Brightlink interactive projector.
1. How to Use the Easy Interactive Tools in Interactive Mode
2. How to Use the Easy Interactive Tools in Whiteboard Mode
3. Epson BrightLink Projectors | How to Use the Interactive Pens
Please note our systems only have one pen.
4. Instructions For Microsoft Ink With Word Documents
To use the Ink Pen tool on a word document
Open a Microsoft Word document.
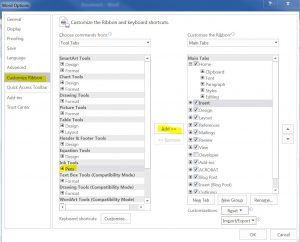
Select File > scroll to ‘Options’ >
On the left-hand side of the Word ‘Options’ box select ‘Customize Ribbon’
Under ‘Choose Commands’ there is a drop-down box, (the first selection is says ‘Popular Commands’)> open that box and select ‘Tool Tabs’.
In that tab highlight ‘Pens’
Select ‘Add’ and hit ‘OK’
Now in your Word document, the top menu bar should have a ‘Pens’ tab. Clicking on that will allow you to use the Ink Pen tool at your discretion on the document
Juggling the dual role of teacher and student was a bit disconcerting at first — probably because I realized that I actually had to teach what I had been learning for the past twelve years — but with a bit of finesse and practice, I came to grow in my role as an adjunct professor.
Research conducted over the past few decades shows it’s impossible for students to take in and process all the information presented during a typical lecture, and yet this is one of the primary ways college students are taught, particularly in introductory courses.
Since 1999, NEA has partnered with the Professional and Organizational Development (POD) Network to provide practical advice to college and university faculty on how to more effectively teach higher education students. Their Thriving in Academe guides have included guides to using social media in the classroom, how to command the attention of students, how to “flip” your classroom, how to teach for “deep learning,” and more.