Author: Jamie Ackley (Page 3 of 3)

Bongo Virtual Classroom – Large Gallery View (display 25 student cameras at once)

Bongo recently introduced a new feature in their virtual classroom platform that increases the number of student cameras that can be displayed at one time.  The Large Gallery view can be found under settings and can be utilized by both the instructor and student to customize their individual view. Presentation view is on by default, but users can toggle between Presentation view and Large Gallery view.

Bongo Virtual Classroom Large Gallery View

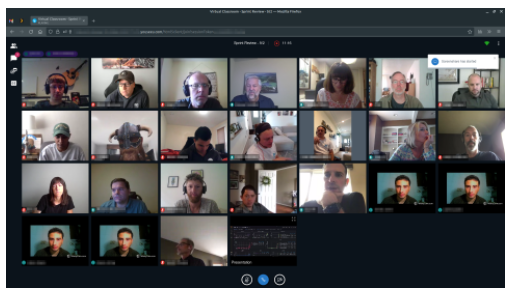
Toggle Between Presentation view and Large Gallery view

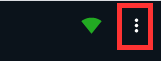
  • While in the virtual classroom, select the Settings options (three dots in the upper right corner)
Bongo Virtual Classroom Settings
  • Select Large Gallery view
Bongo Virtual Classroom Toggle to Large Gallery View

  • Repeat steps to return to Presentation view
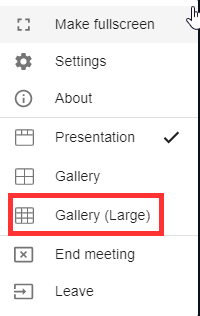
  • Important Note – In order to use Large Gallery view, at least one camera must be turned on, otherwise this option will be greyed out.  Large Gallery view is not available on mobile devices.

    Pin Your Camera to be the First Displayed

    • Click on Participants
    • Select Your Name
    • Select Pin camera
    Bongo Virtual Classroom Pin Camera

    For a complete list of recent Bongo updates see:  https://bongolearn.zendesk.com/hc/en-us/articles/4406998122907-Bongo-21-9-Release-Notes

    Using Respondus Lockdown Browser with a Pearson MyLab course

    South Suburban College has an institutional license for Respondus Lockdown Browser.  Students should never have to pay any fees associated with Respondus Lockdown Browser.

    If using a MyPearson lab course, instructors will have to complete an additional step to avoid students paying a fee.  It’s a one-time set up of connecting Respondus Lockdown Browser in D2L to their Pearson  MyLab course.

    Step 1: Enter your course in D2L

    • Select Quizzes > LockDown Browser
    • Select Continue
    • Under LockDown Browser Resources > Select Other Systems
    • Select the + icon next to Pearson MyLab
    • Copy the Pearson MyLab Code (code is unique for each instructor)

    Step 2: Go to your Pearson MyLab course

    • Navigate to course settings > Learning Aids and Test Options
    • Under LockDown Browser and Proctoring > Check Use Automated Monitor in this course
    • Select Complete the Respondus Monitor Proctoring license Set up
    • Paste the Pearson MyLab Code from Step 1 above
    • Select Make Available

    Release an Assignment or Quiz to a Particular Section of Students

    When teaching a combined section course, there may be times when an instructor would like to release an assignment or quiz to a particular section of students.  Releasing assignments and quizzes to sections have slightly different directions which are referenced below:

    Assignment – Release an assignment to a particular section of students

    • Edit a current Assignment
    • Select Availability Dates and Conditions
    • Under Release Conditions > Select Add a Release Condition
    • Select Create New
    • Under Condition Type > Select Section Enrollment
    • Under Condition Details > Select the Section and Create
    • Only students in that section can now access the assignment

    Quiz – Release a quiz to a particular section of students

    • Edit a current Quiz > select Restrictions
    • Under Release Conditions > Select Create and Attach

    • Under Condition Type > Select Section Enrollment
    • Under Condition Details > Select the Section and Create
    • Only students in that section can now access the quiz

    Release an Assignment or Quiz to Student Groups

    There may be times when an instructor would like to release a quiz to a particular group of students.  For example, an instructor may have a group project as part of an assignment and would like to release an assignment or quiz to just that particular group. 

    The first step is creating student groups and enrolling students into that group.  The next step includes adding restrictions to a quiz or assignment based on the group.

    Step 1: Create Groups in child shell course (combined section)

    • Go to Course Tools > Groups > New Category
    Manage Groups
    • Provide a Category Name, such as Labs
    • Enrollment Type:  Select # of Groups – No Auto Enrollment (this allows the instructor to manually enroll students into each group)
    • Select Number of Groups
    • Provide Group Prefix.  This name will appear before each group number (Labs 1, Labs 2)­­
    • Save
    Category Information

    Step 2: Manually Enroll Students into each Group

    • Select the Group Name
    Category Name
    • Select Enroll Users
    Edit Group
    • Select the student names
    • Save

    Step 3: Create a Restriction for the Quiz based on Groups

    • Edit the current Quiz > select Restrictions
    • Under Release Conditions > Select Create and Attach
    Restriction
    • Under Condition Type > Select Group Enrollment
    • Select the Group that the quiz should be release to
    • Select Create
    New Restriction
    • Quiz now has a Group Restriction
    Group Restriction

    Newer posts »