
Updated: August 4, 2021
Need help getting to know your new Promethean Titanium ActivPanel? Here are some great resources and tips!
Visit https://learn.prometheanworld.com/us/ for more instructor training directly from Promethean!
Quick Start Steps
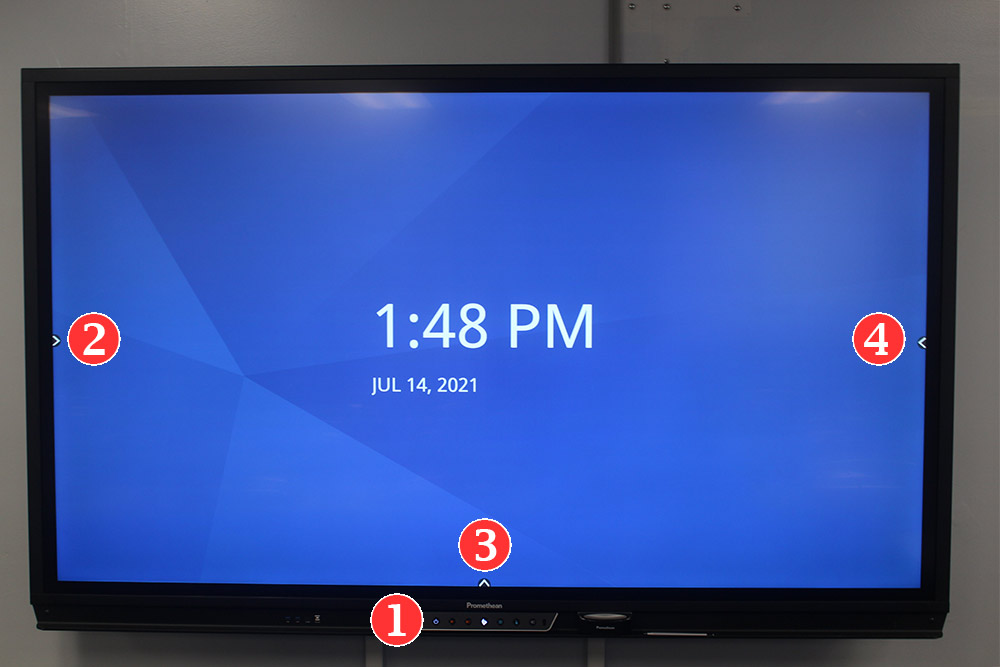
Red Circle 1: Although the Promethean ActivPanel should come on automatically as you approach, there is a ‘POWER BUTTON’ on the bottom of the frame to turn the unit on/off.
Red Circle 2, 3 & 4: These arrows provide access to your ActivPanel ‘MENU’ page.
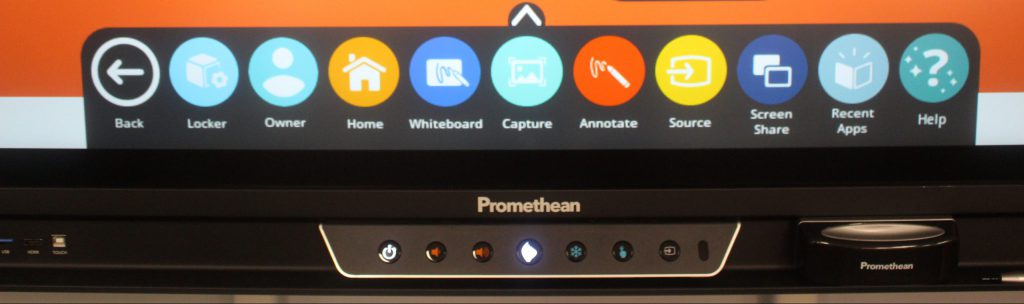
Pictured above is the ‘LOCKER’ options menu with the Apps and Settings. Promethean ‘LOCKER’ allows access to commonly used Apps such as:
- Chromium (Default Web Browser)
- Microsoft Office
- Adobe Acrobat
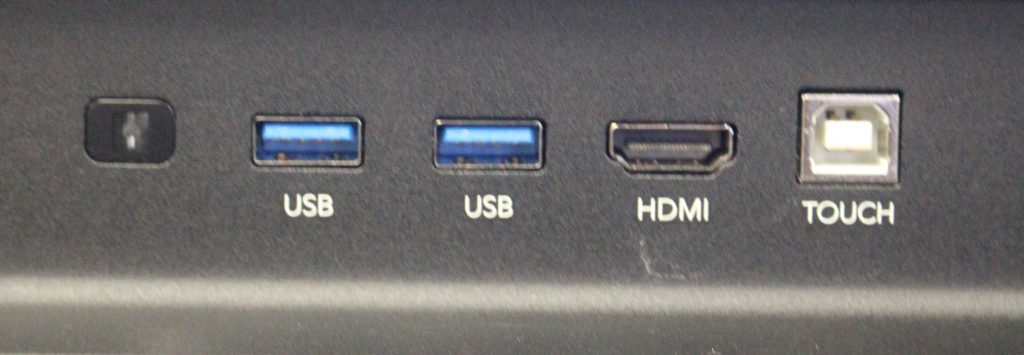
The Promethean ActivPanel has additional USB and HDMI ports for accessing external media located at the bottom front of the frame.
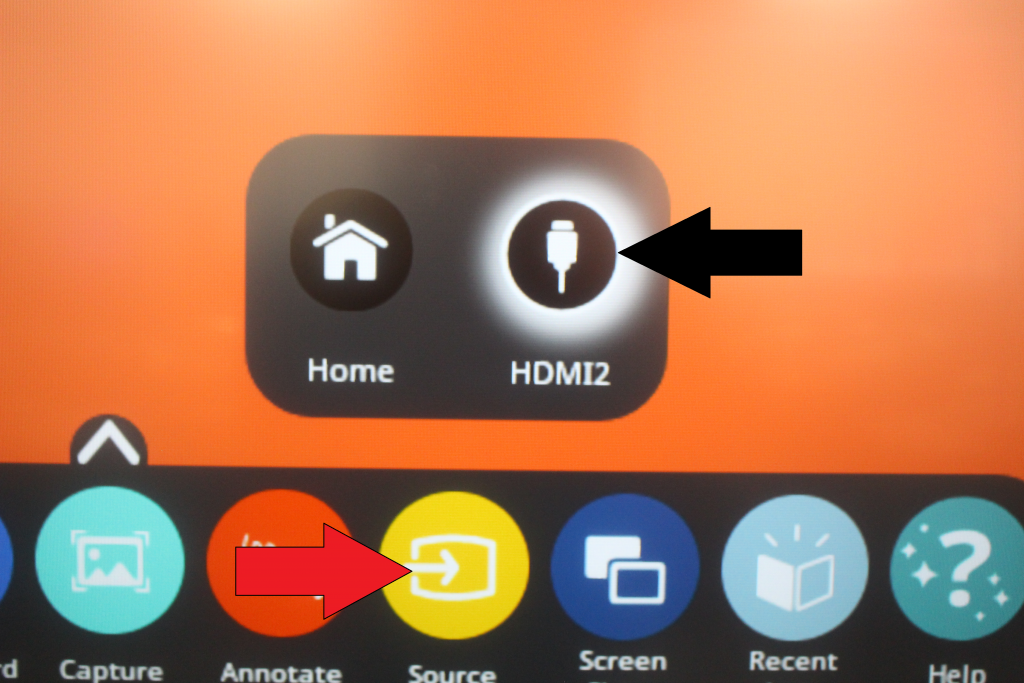
The Promethean ActivPanel has an option to mirror what is on the Teacher’s Workstation in the classroom. On the home screen select one of the arrows to bring up the menu block. Click on ‘SOURCE’ and select ‘HDMI 2’. The display on the Promethean ActivPanel will now mirror the Teacher’s Workstation. The Promethean ActivPanel is a touch-screen and can now be used to control the Teacher’s Workstation.
You can also change the input by pressing the ‘Source’ button on the bottom of the ActivPanel frame.
Please note that the Promethean ActivPanel is touch-sensitive. It is important to not PRESS TOO HARD which can cause DAMAGE to the screen. The ActivPanel comes with a ‘PEN’ for those who want to use it as an option to the touch-screen function.
__________________________________________________________________________________________
Optional Laptop Connection
Instructors can use their personal lap top computer to replace the Teacher’s Workstation in the classroom.
NOTE: By using your personal laptop you will not be able to use the interactive features of the Epson Integrated Projector or the Promethean ActivPanel.
Step 1: Connect the USB and HDMI cables into the corresponding laptop ports as shown below.
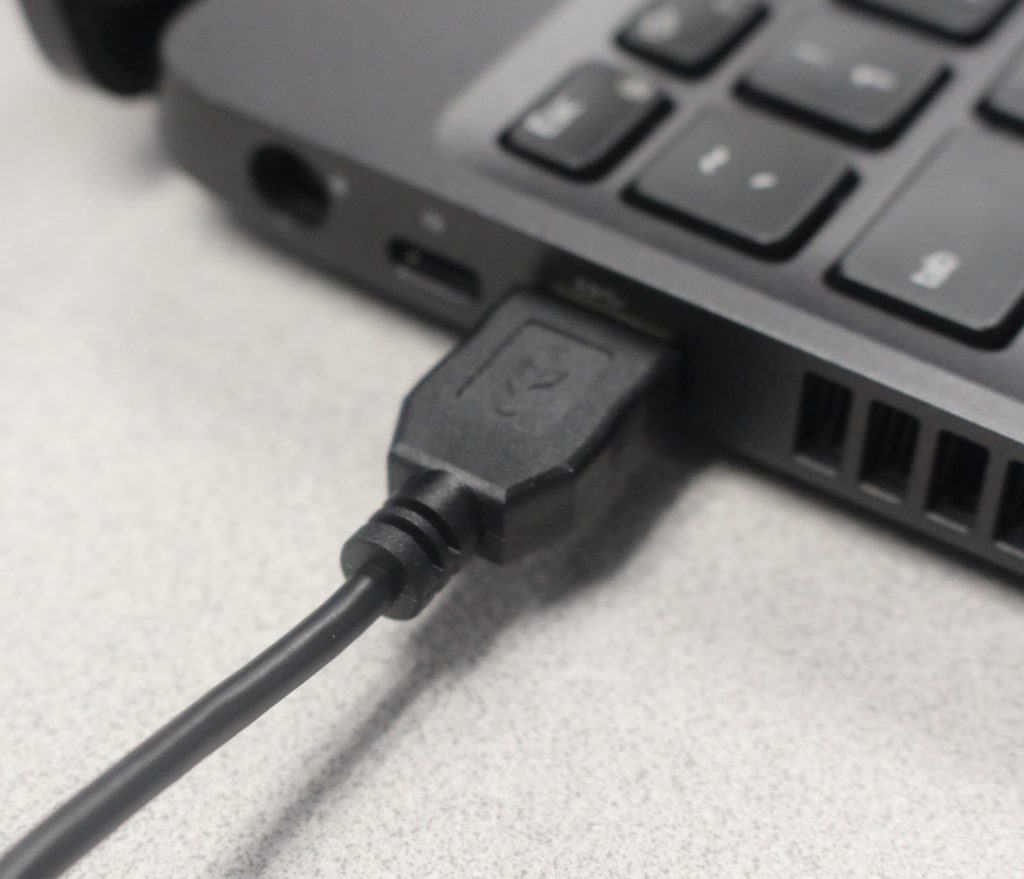
USB Connection
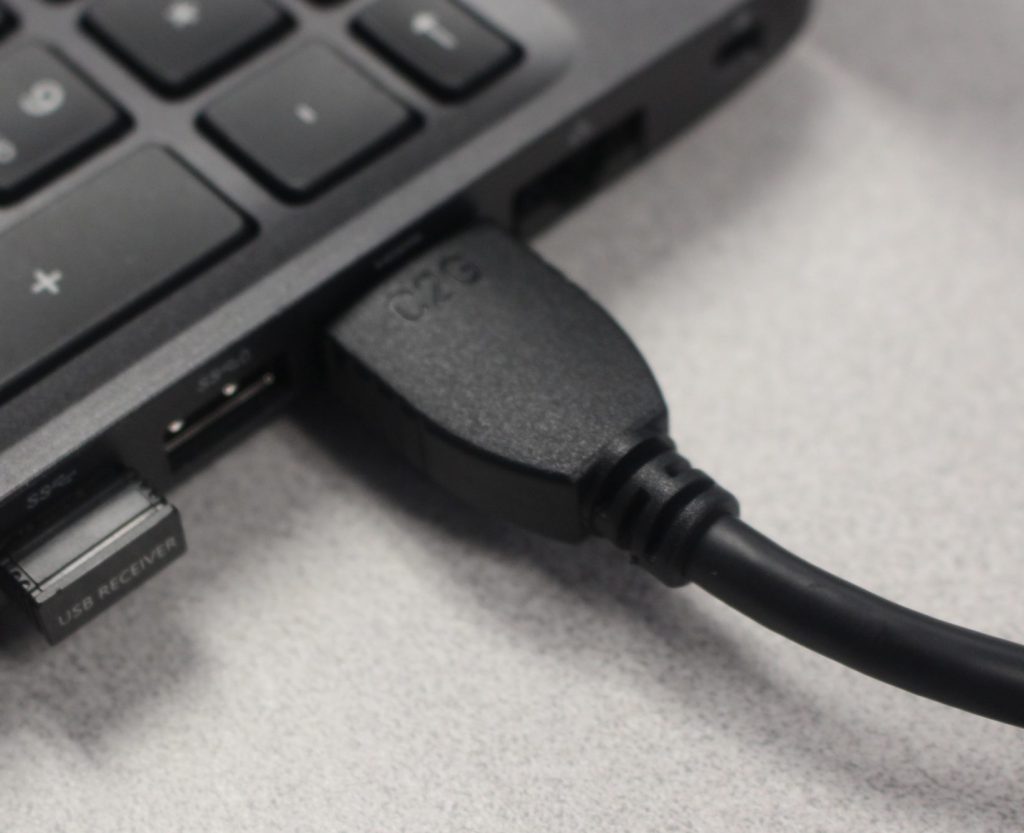
HDMI Connection
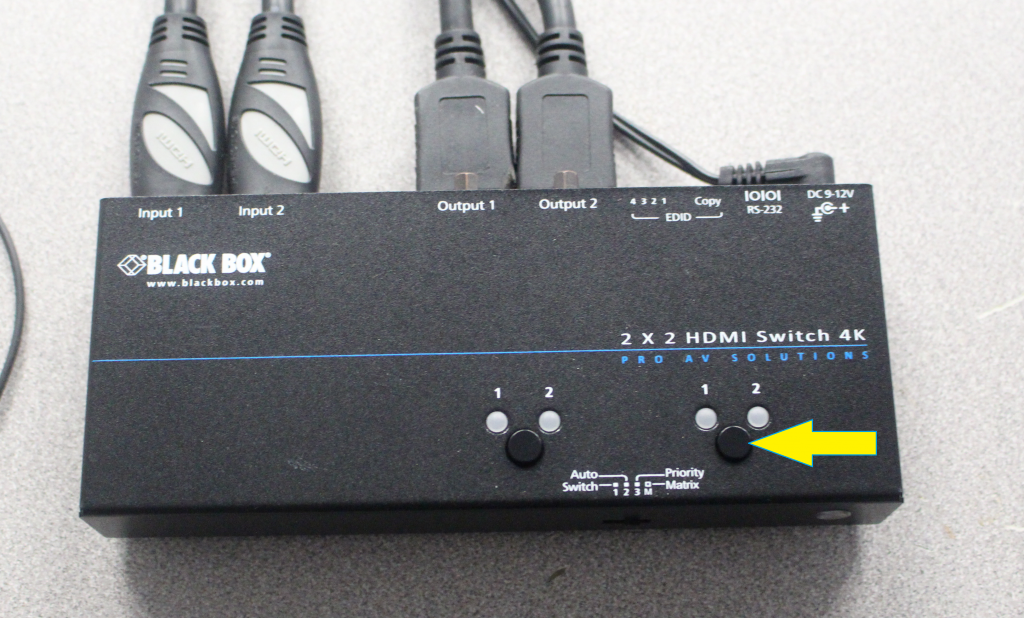
Step 2: Press the black button so the green light changes from input 1/A to input 2/B on the HDMI video switch. This connects the laptop to the projection system.
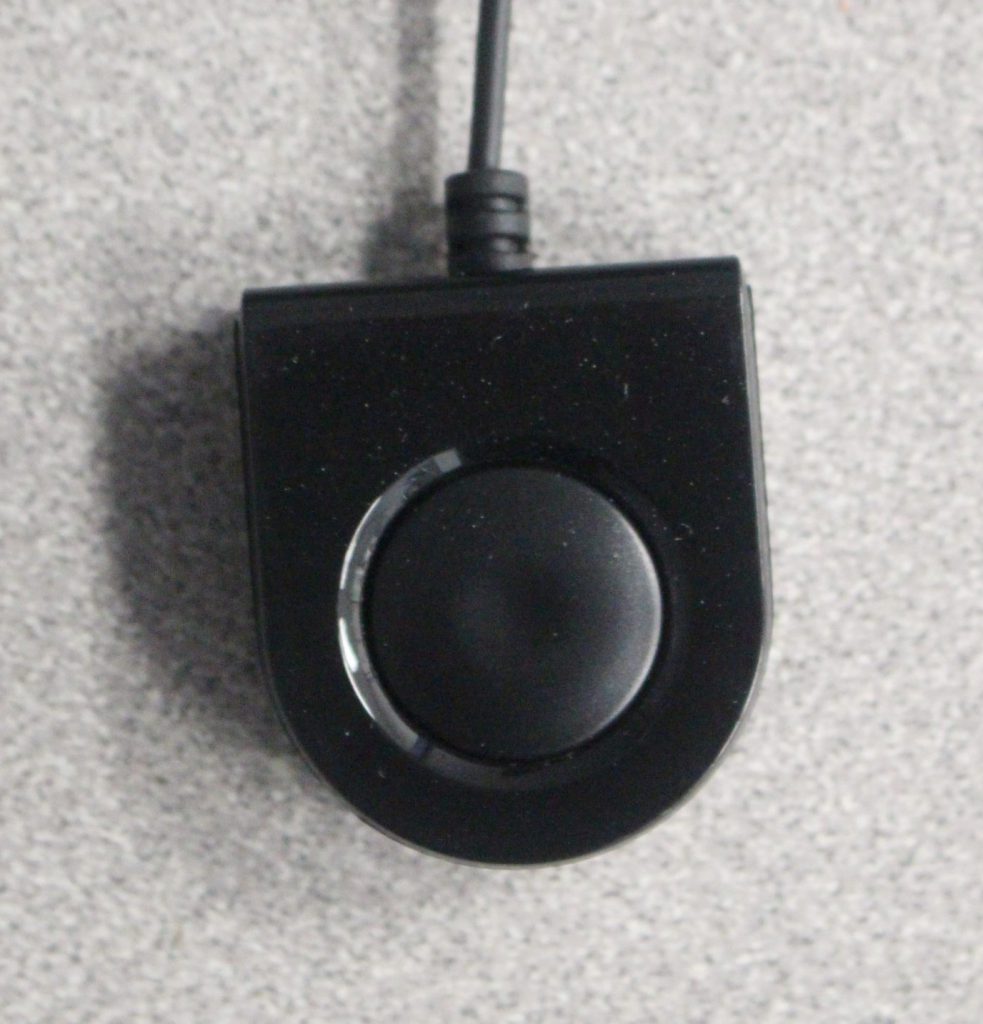
Step 3: Press the circular Webcam controller button to switch the Webcam connection from the Instructor Workstation to the Laptop.
__________________________________________________________________________________________
Optional Use of a Document Camera
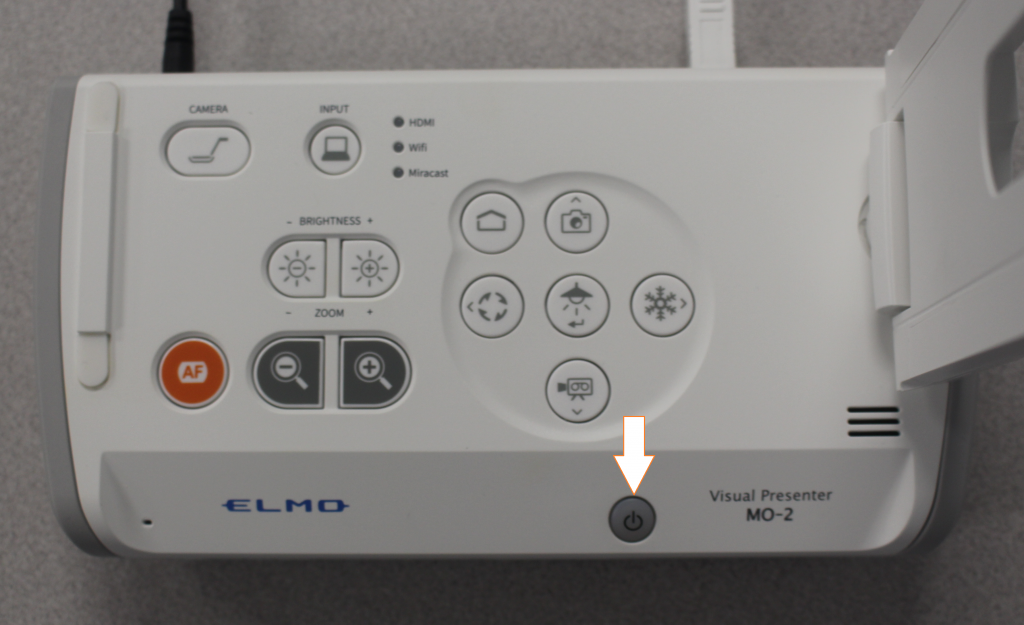
Step 1: Turn on (Blue Light Comes On) the Elmo Document Camera Power
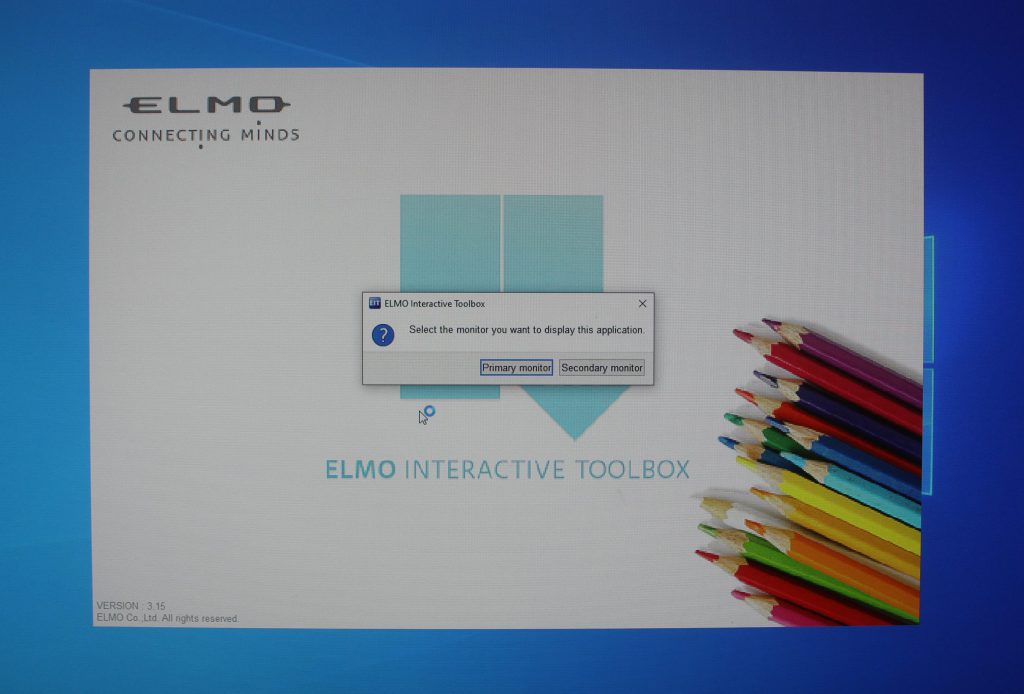
Step 2: Select ‘EIT ICON’ Shortcut on Teachers Workstation.
Step 3: Select ‘Primary Display’ to display image on Teachers Workstation or Select ‘Secondary Display’ to display image on Projector Display Screen.
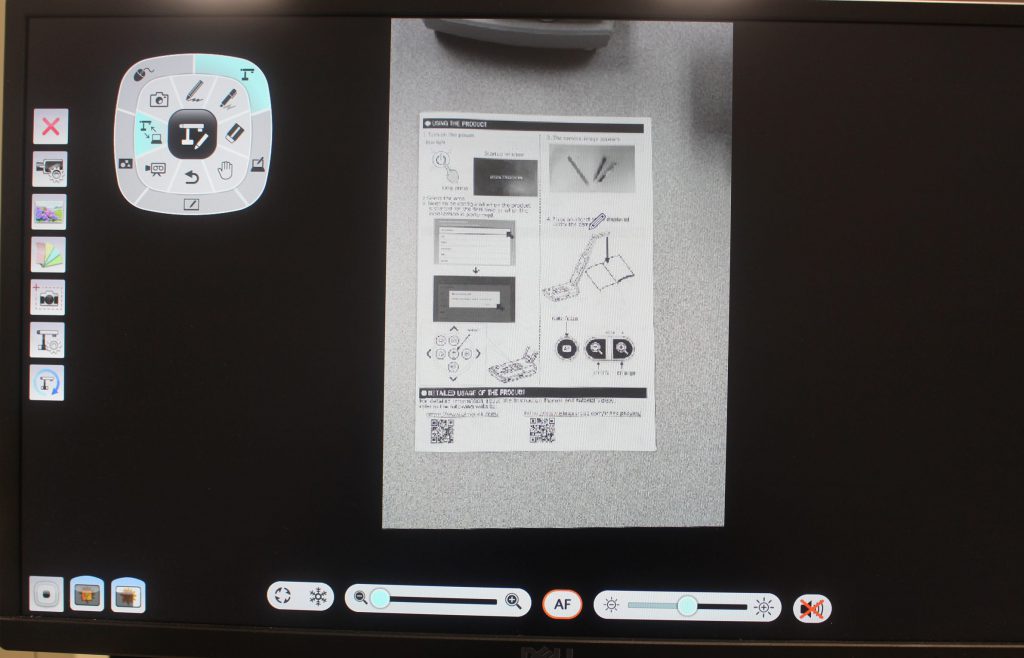
Step 4: Users can use the ‘Pen Feature’ within the EIT Program to mark or edit what is being displayed.
Step 5: Once you are finished with the unit, make sure you turn the document camera off. (NO Lights on the unit).